User guide
How to use the portal day to day: the application link, taking a new starter through the steps, and keeping current staff's documents current. For what's happening underneath, see How it works.
Finding your way around
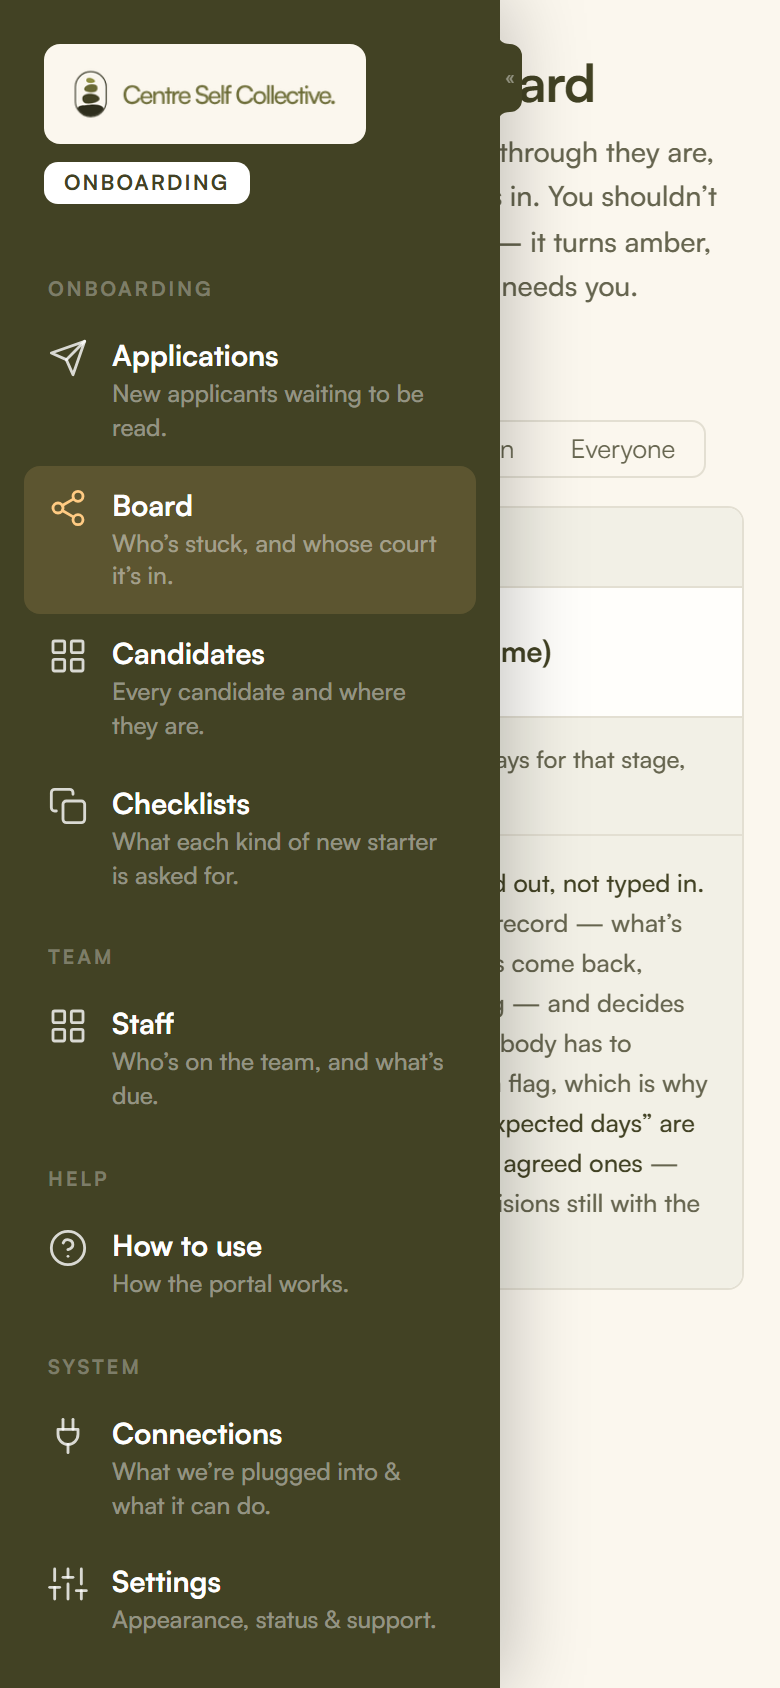
The menu on the left is the same on every screen. These three are where you'll spend your time:
On a phone the menu folds down to icons; the small tab on its edge opens it.
The application link
Applicants never need a login. Put the link on a job ad, your website or an email and they fill in one page.
Step by step: from a job ad to the Board
-
They fill in the form. Name, contact details, the role, a short note, and their CV and cover letter. It takes a couple of minutes and says plainly how their information is handled.
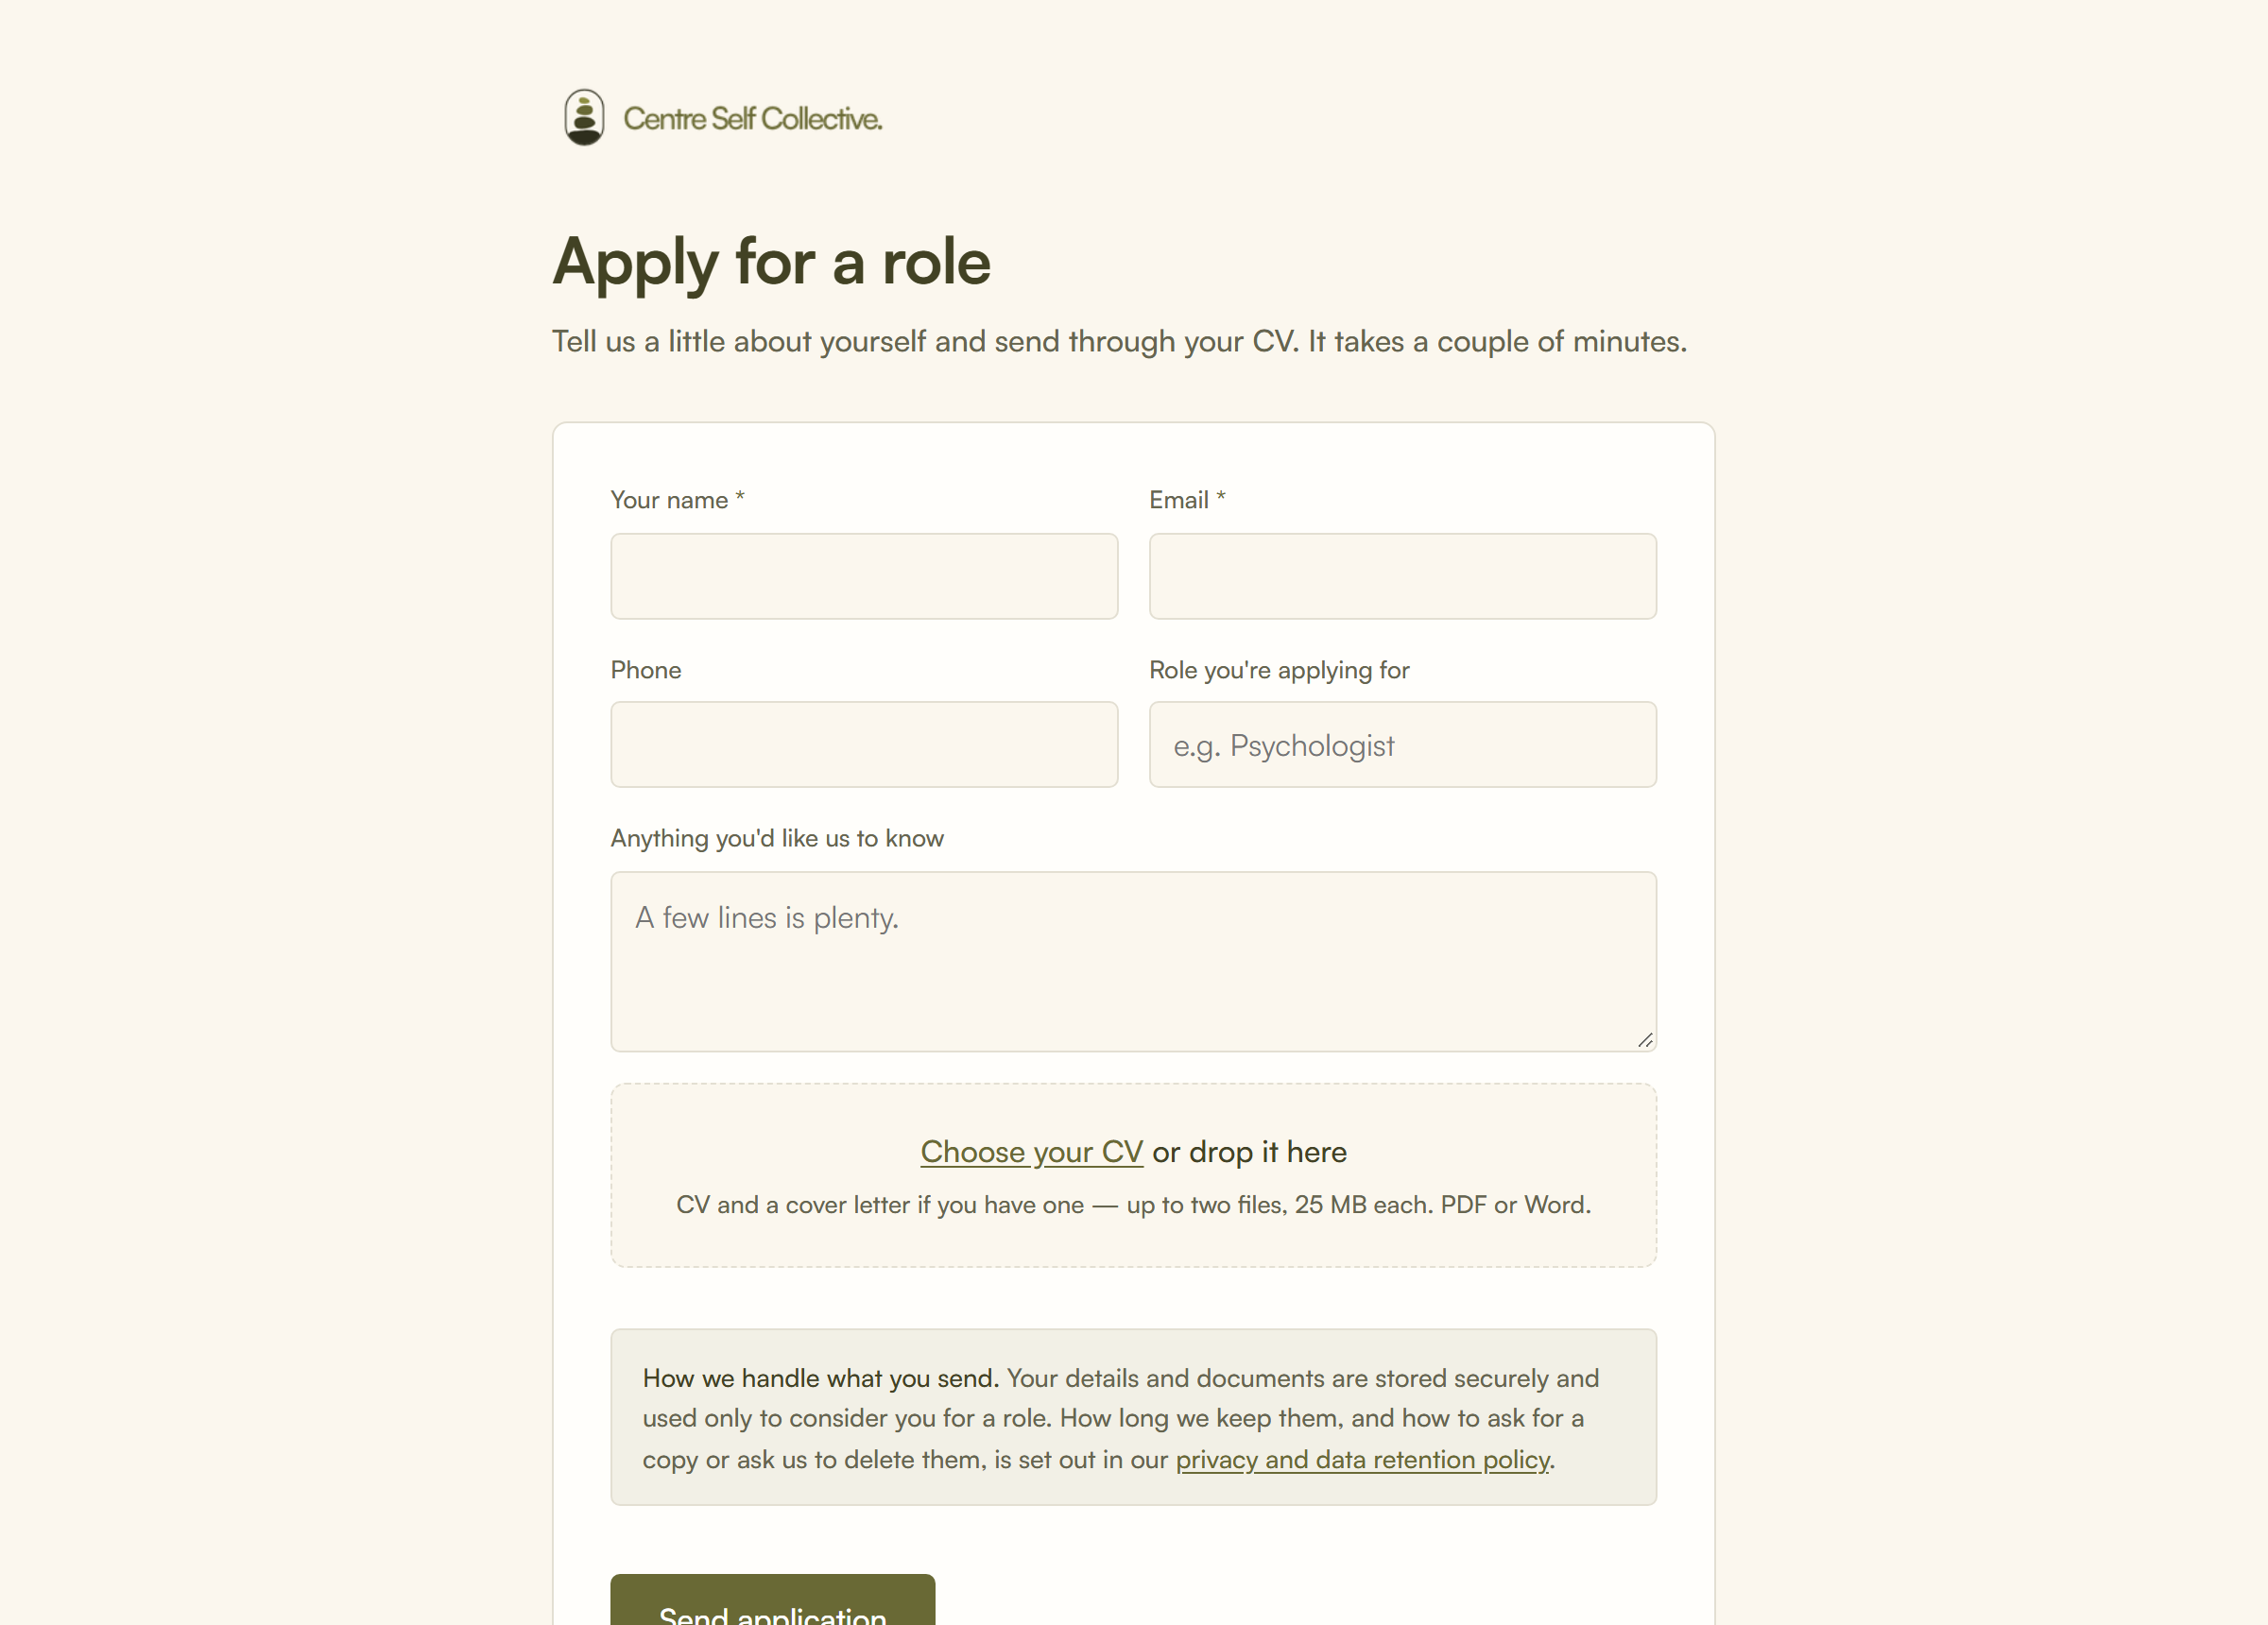
The application form -
They get a confirmation straight away, and their files are filed in SharePoint under their name at the same moment. Nothing waits for a person.
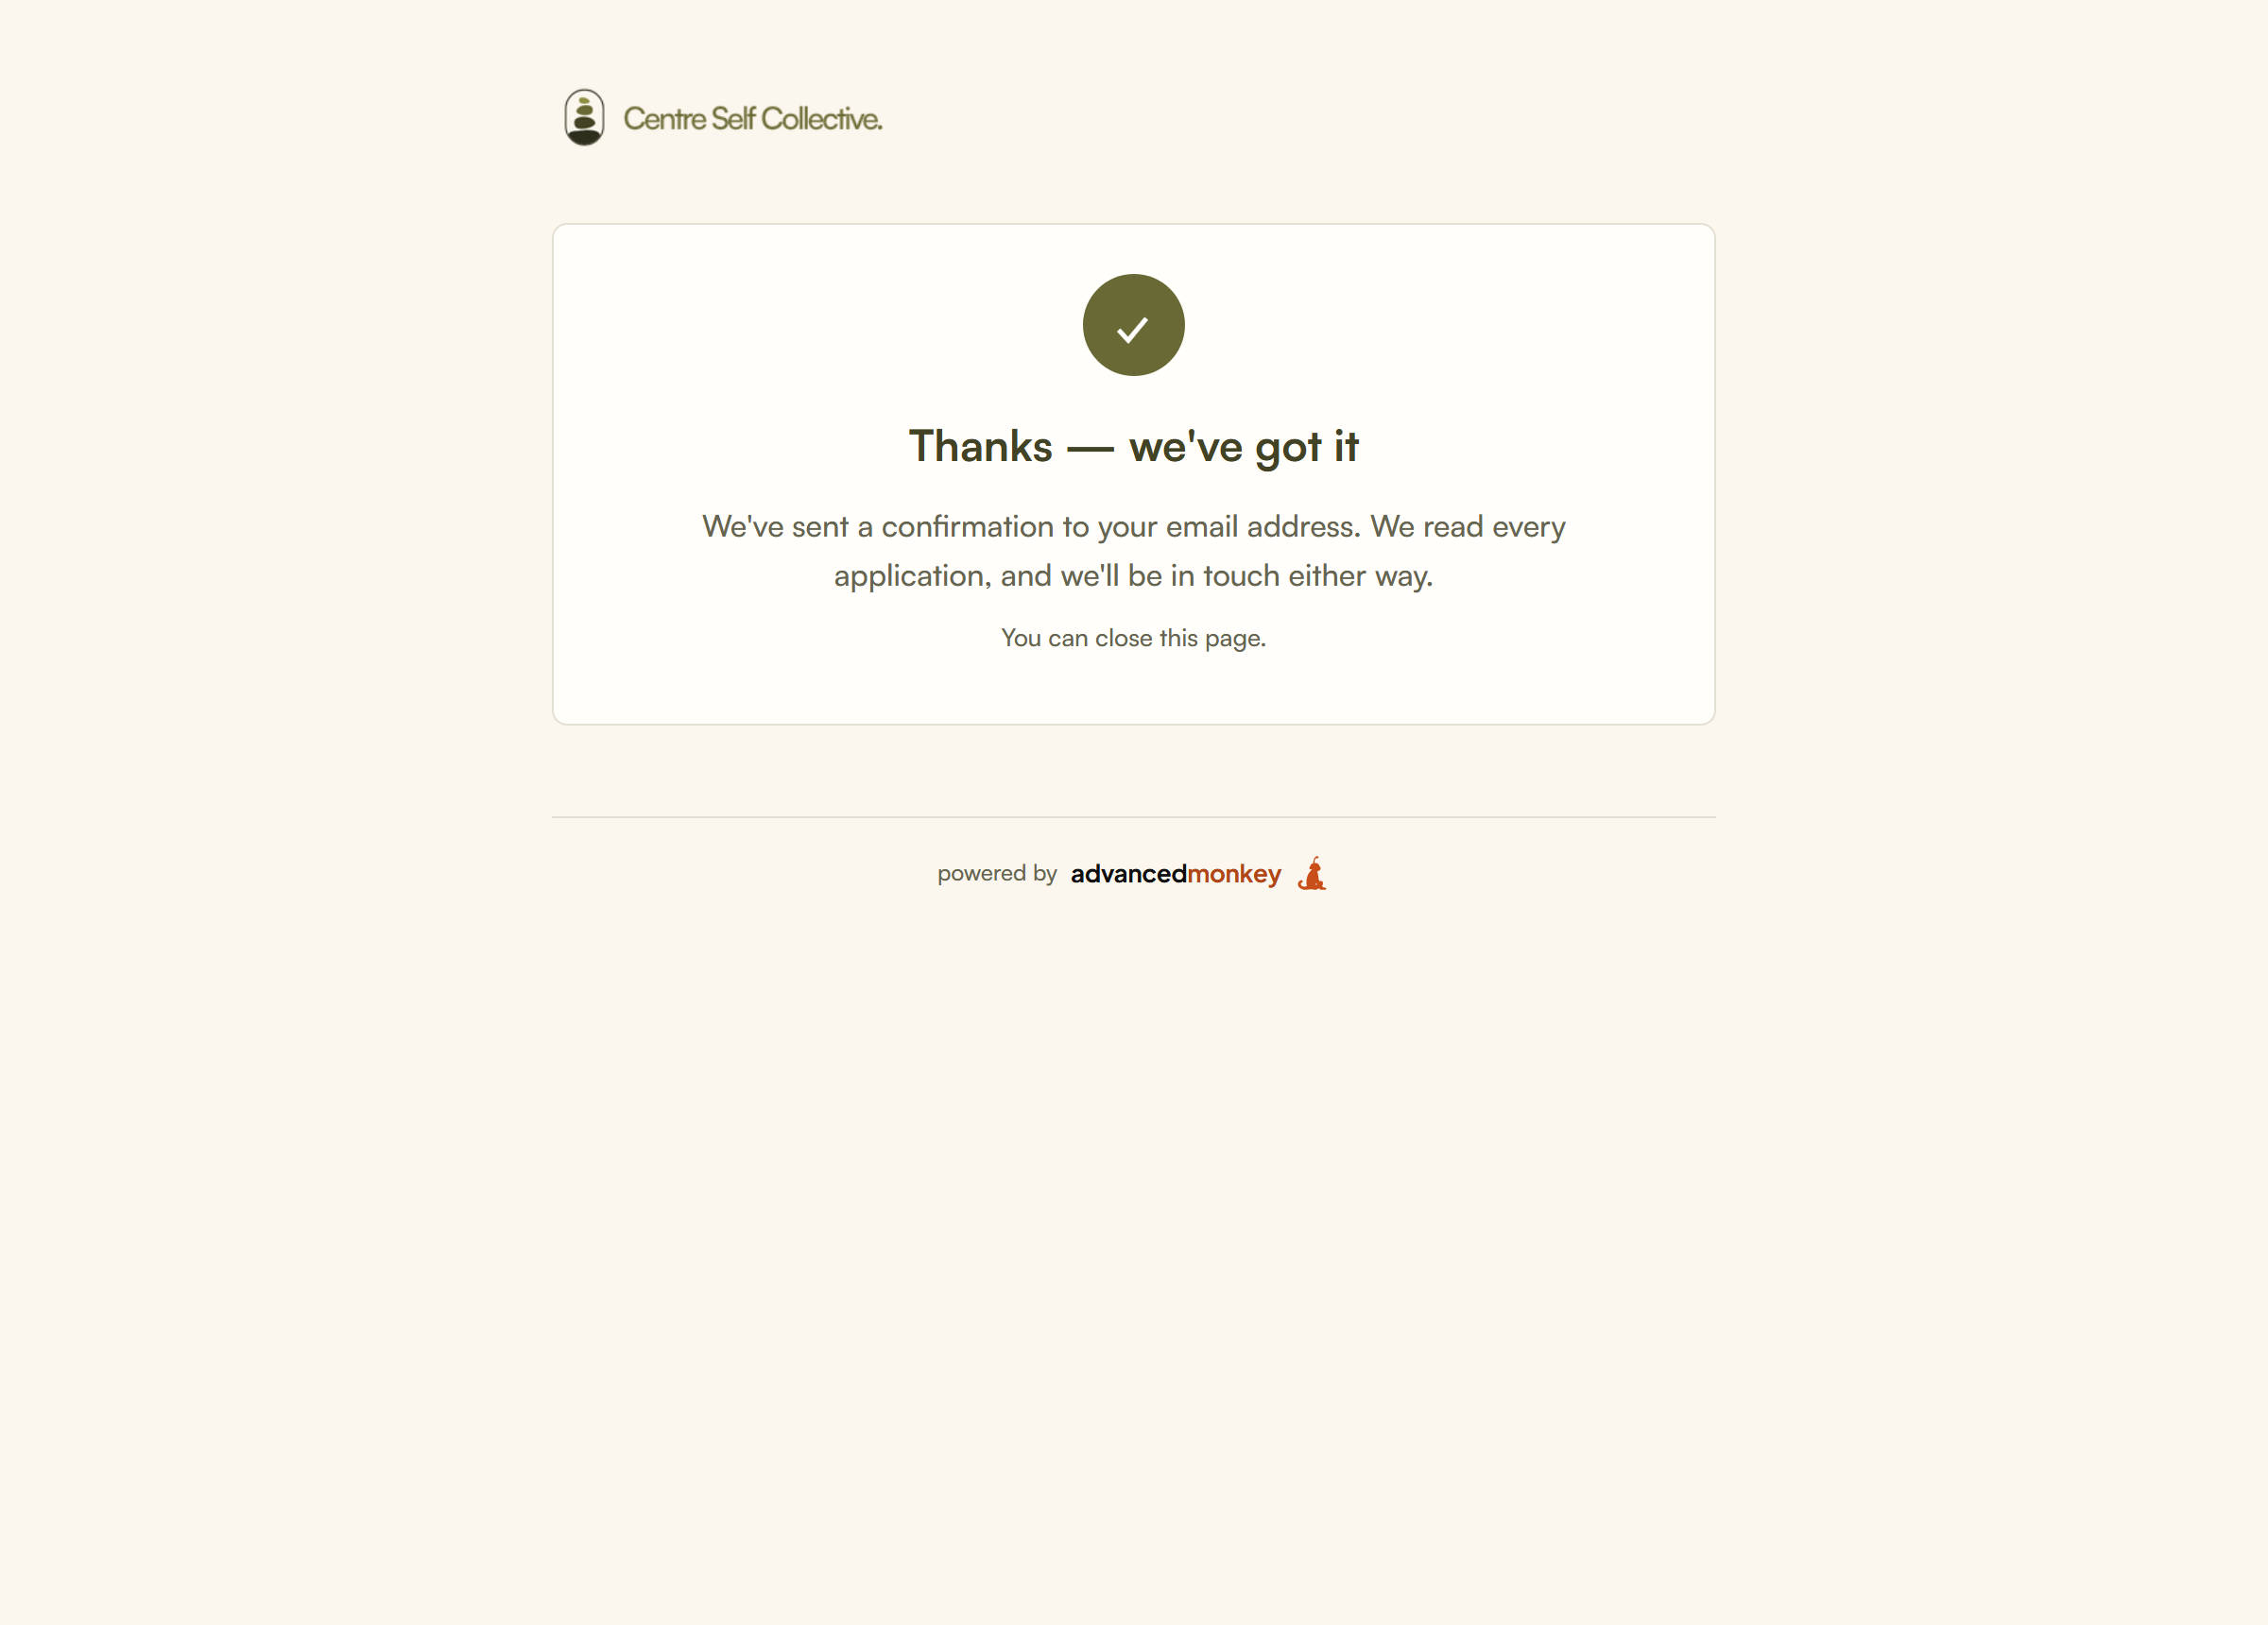
What the applicant sees after sending -
It lands in Applications. Each person is a card with their note and documents. Nothing here is on the Board yet, on purpose, so unread applicants never crowd out the people who need you today. Open How this works at the top of that screen for a picture of where everything goes.
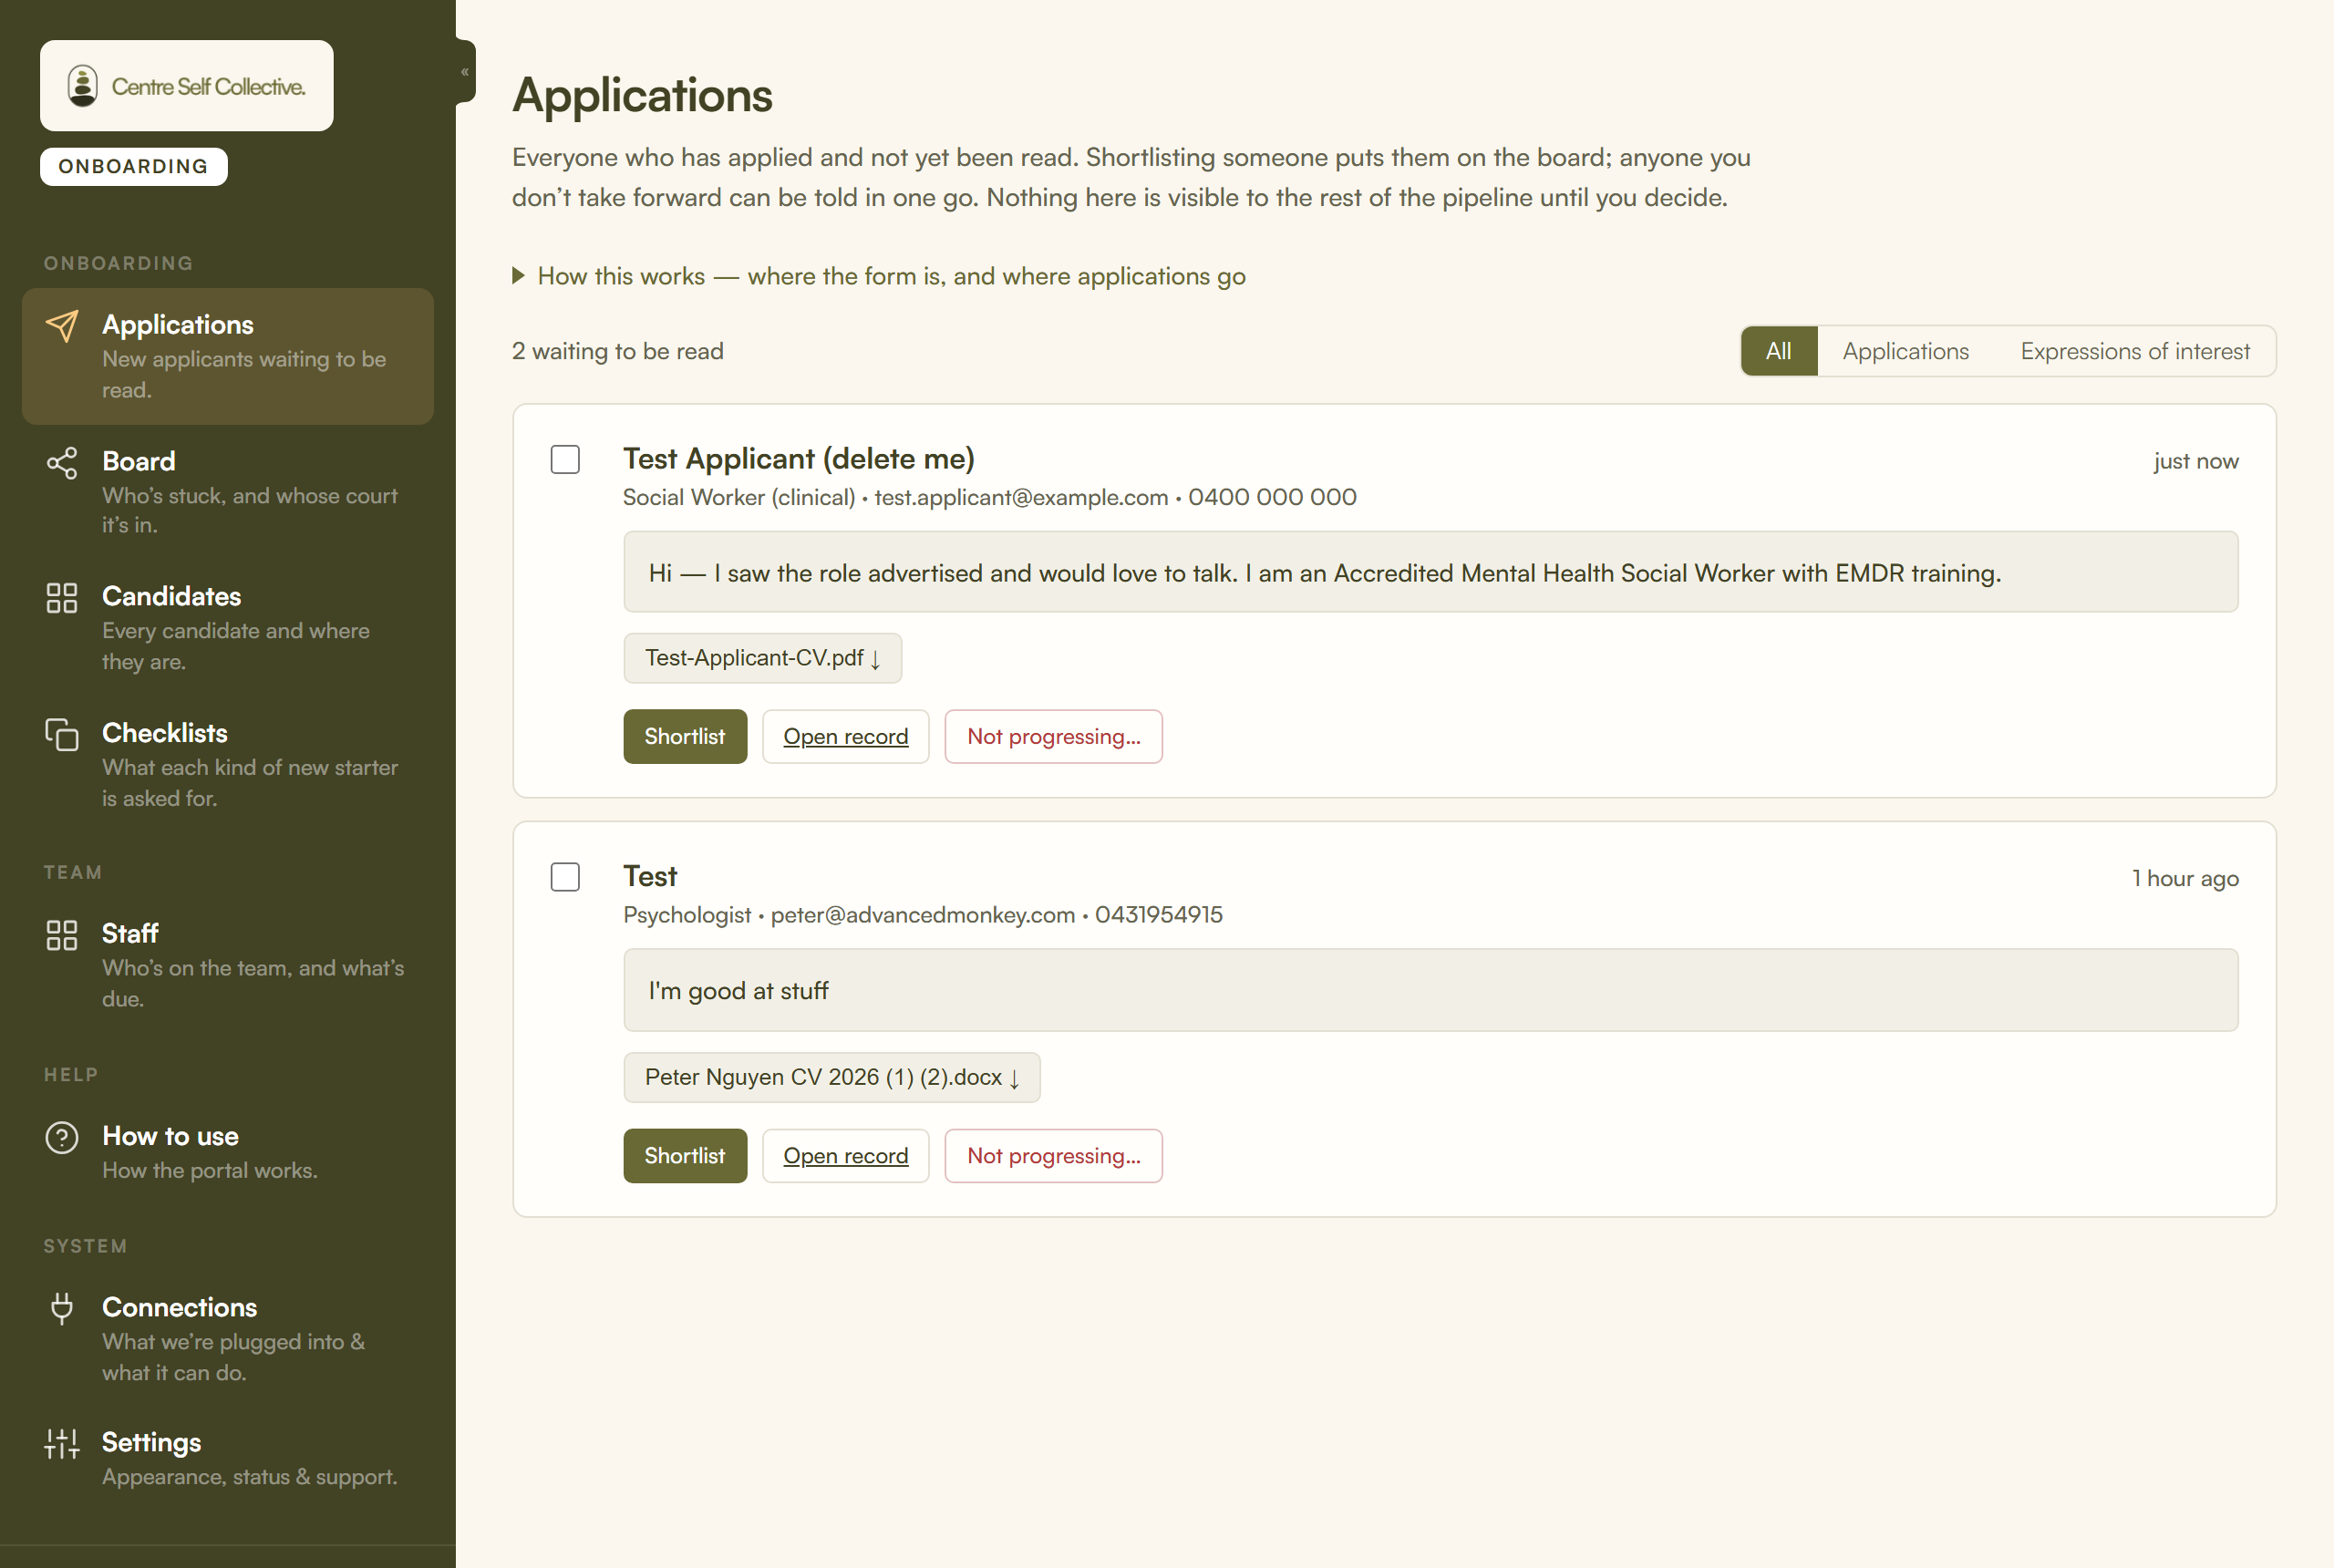
Applications — everyone waiting to be read -
You decide, with one of two buttons.
- Shortlist puts them on the Board at step 1. Nothing is sent to them; it just means "we've read this".
- Not progressing… tells people politely, in one go. You see the exact email before anything is sent, and you can tick close without emailing for anyone you've already spoken to.
-
They appear on the Board. It shows everyone in flight, how far through they are, whose court the ball is in, and how long they've sat at the current step. A row turns amber when it's over the expected days for that step and red at double, so you don't have to watch it.
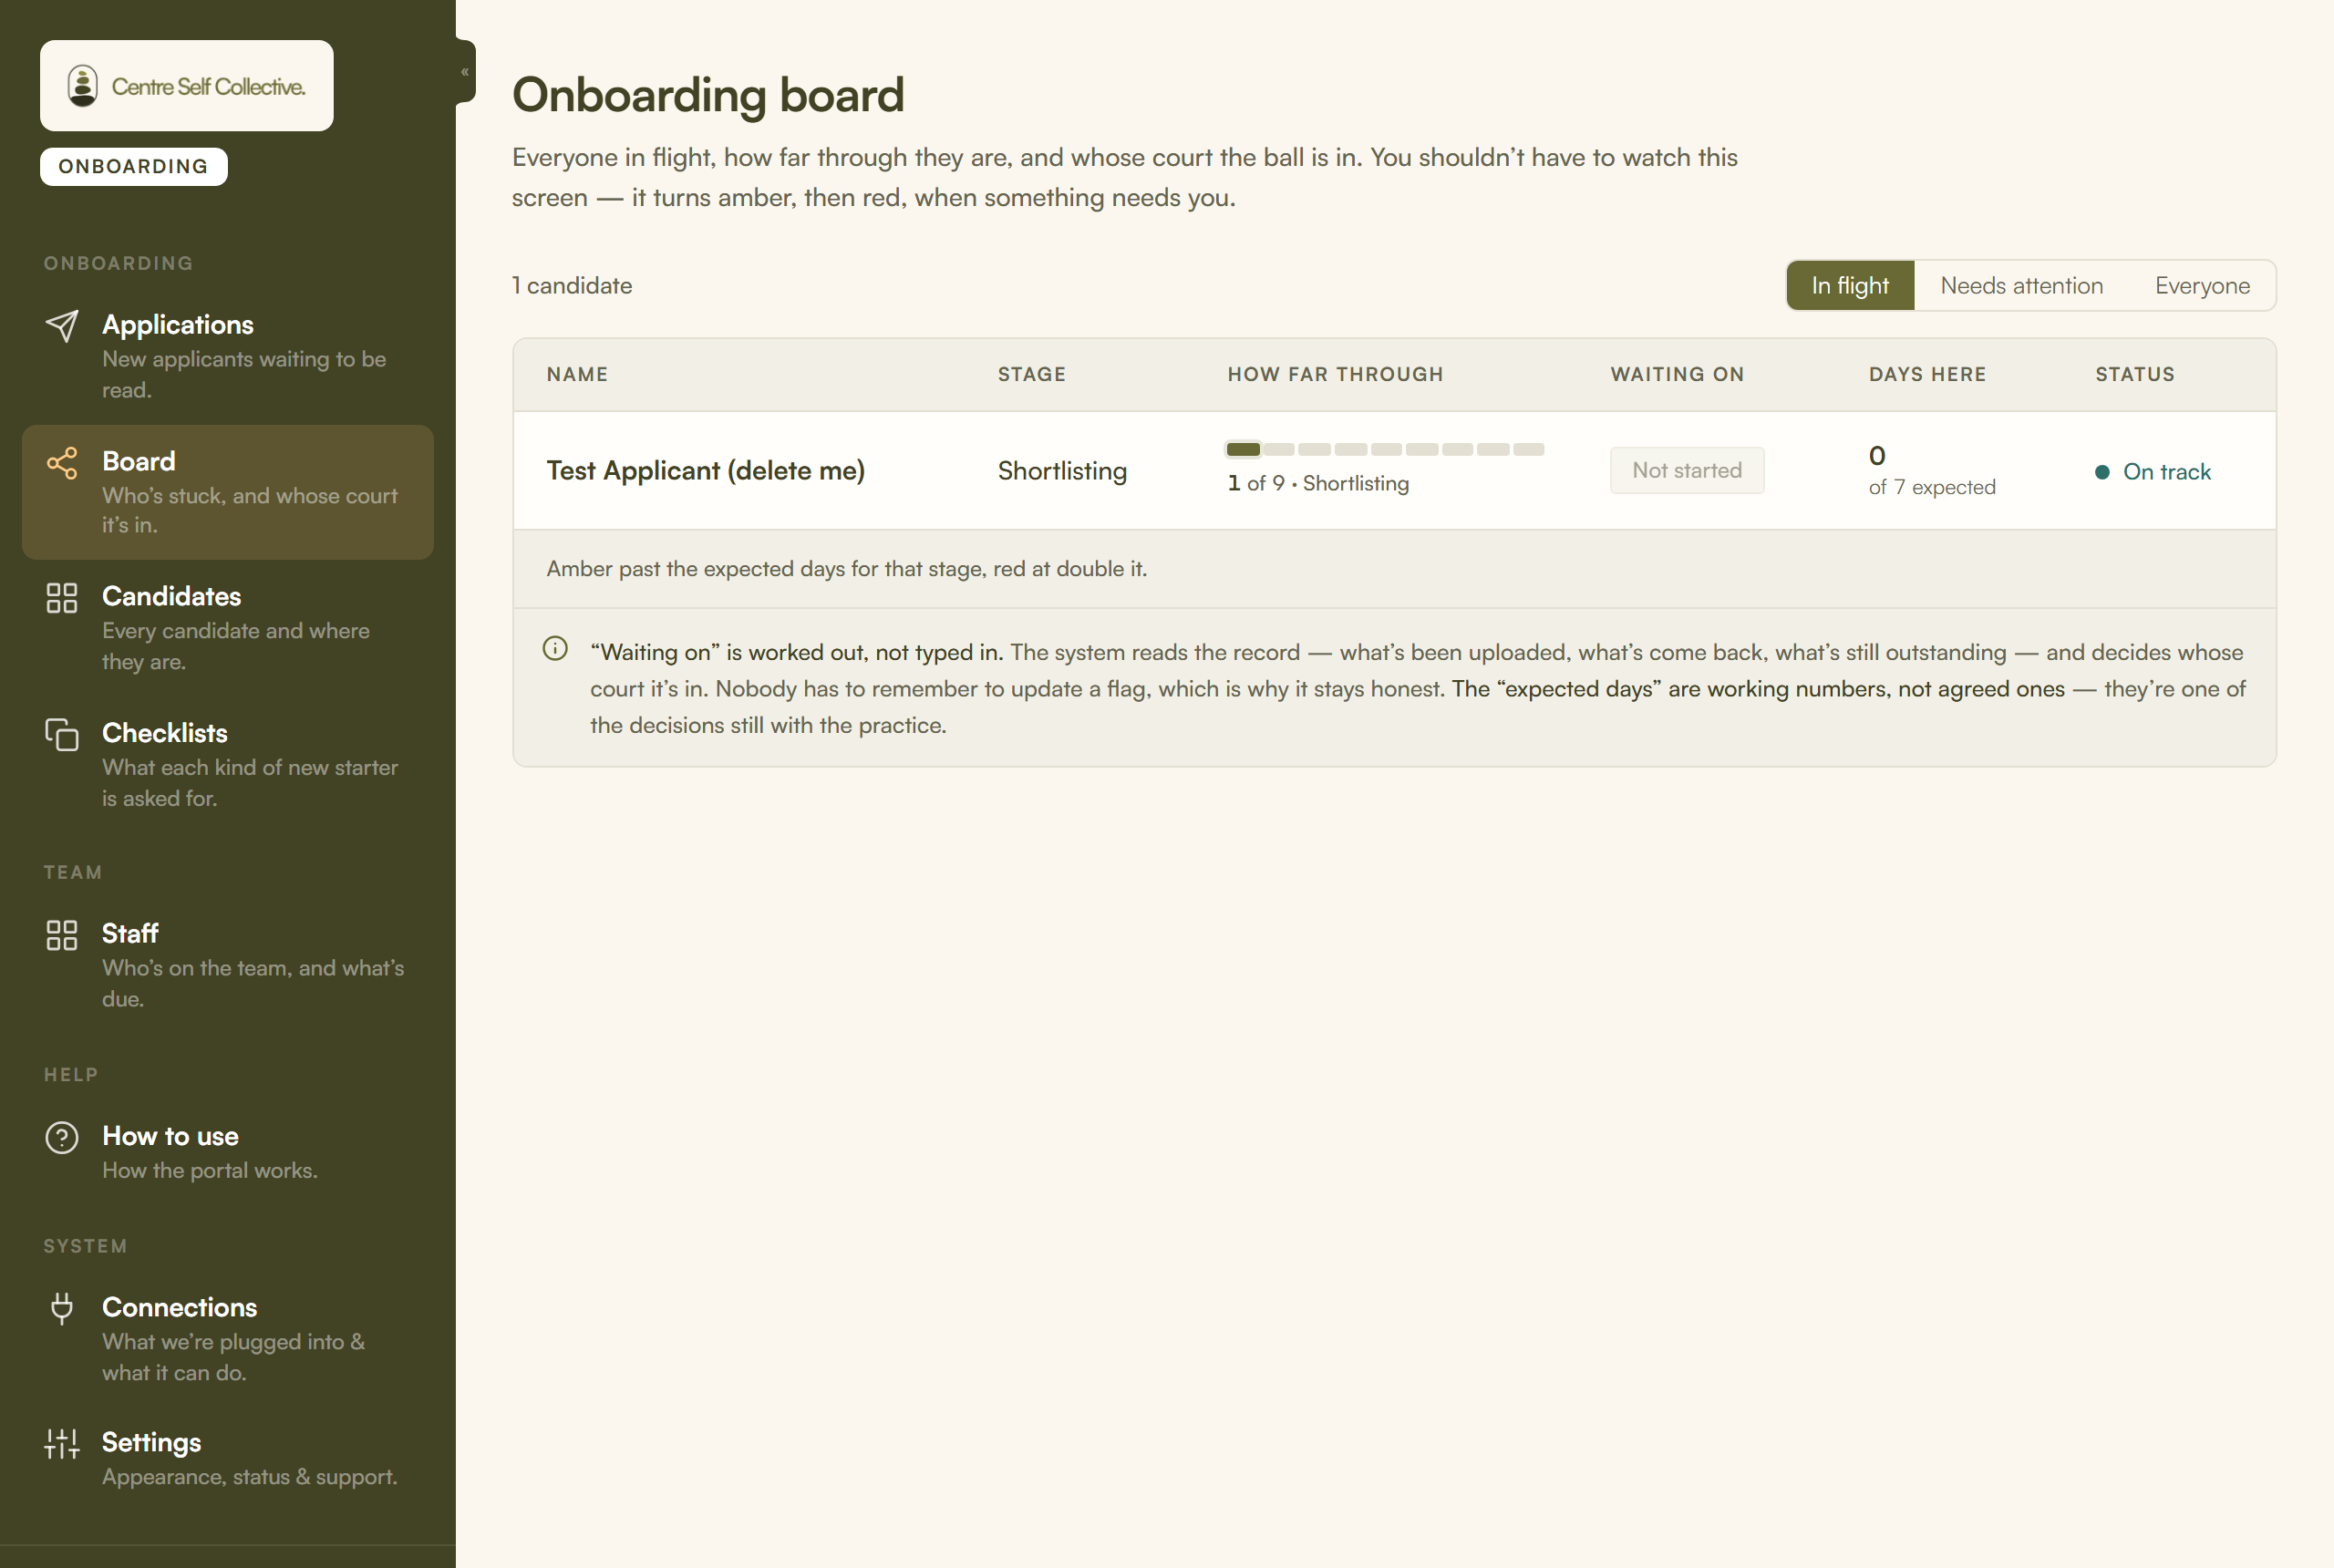
The Board — who's stuck, and whose court it's in
Onboarding a new starter
Hiring is a sequence of nine steps. You move each person along from the Candidates screen; the portal shows them a friendlier version and only reveals the later steps once they've been offered the role.
- Shortlistingyou've read their application
- Interviewtime, place and format live on their record
- Reference checksalways before an offer
- Letter of offer
- Verificationpolice check, WWCC, registration, insurance
- Sign-offan owner confirms the evidence is complete
- Contractsigned and returned through the portal
- Provisioning & orientationthe moment they become staff
- Profile & launchbio, photo, ready to see clients
Someone can also be marked Not progressing or Withdrawn at any point. That closes their record and switches off their portal sign-in.
Step by step: working a candidate
-
Open Candidates. Every person in the pipeline, with their stage in a dropdown. Change the stage here as things progress; this screen is the record. Someone who comes to you directly is added with + New candidate; a name and email is enough.
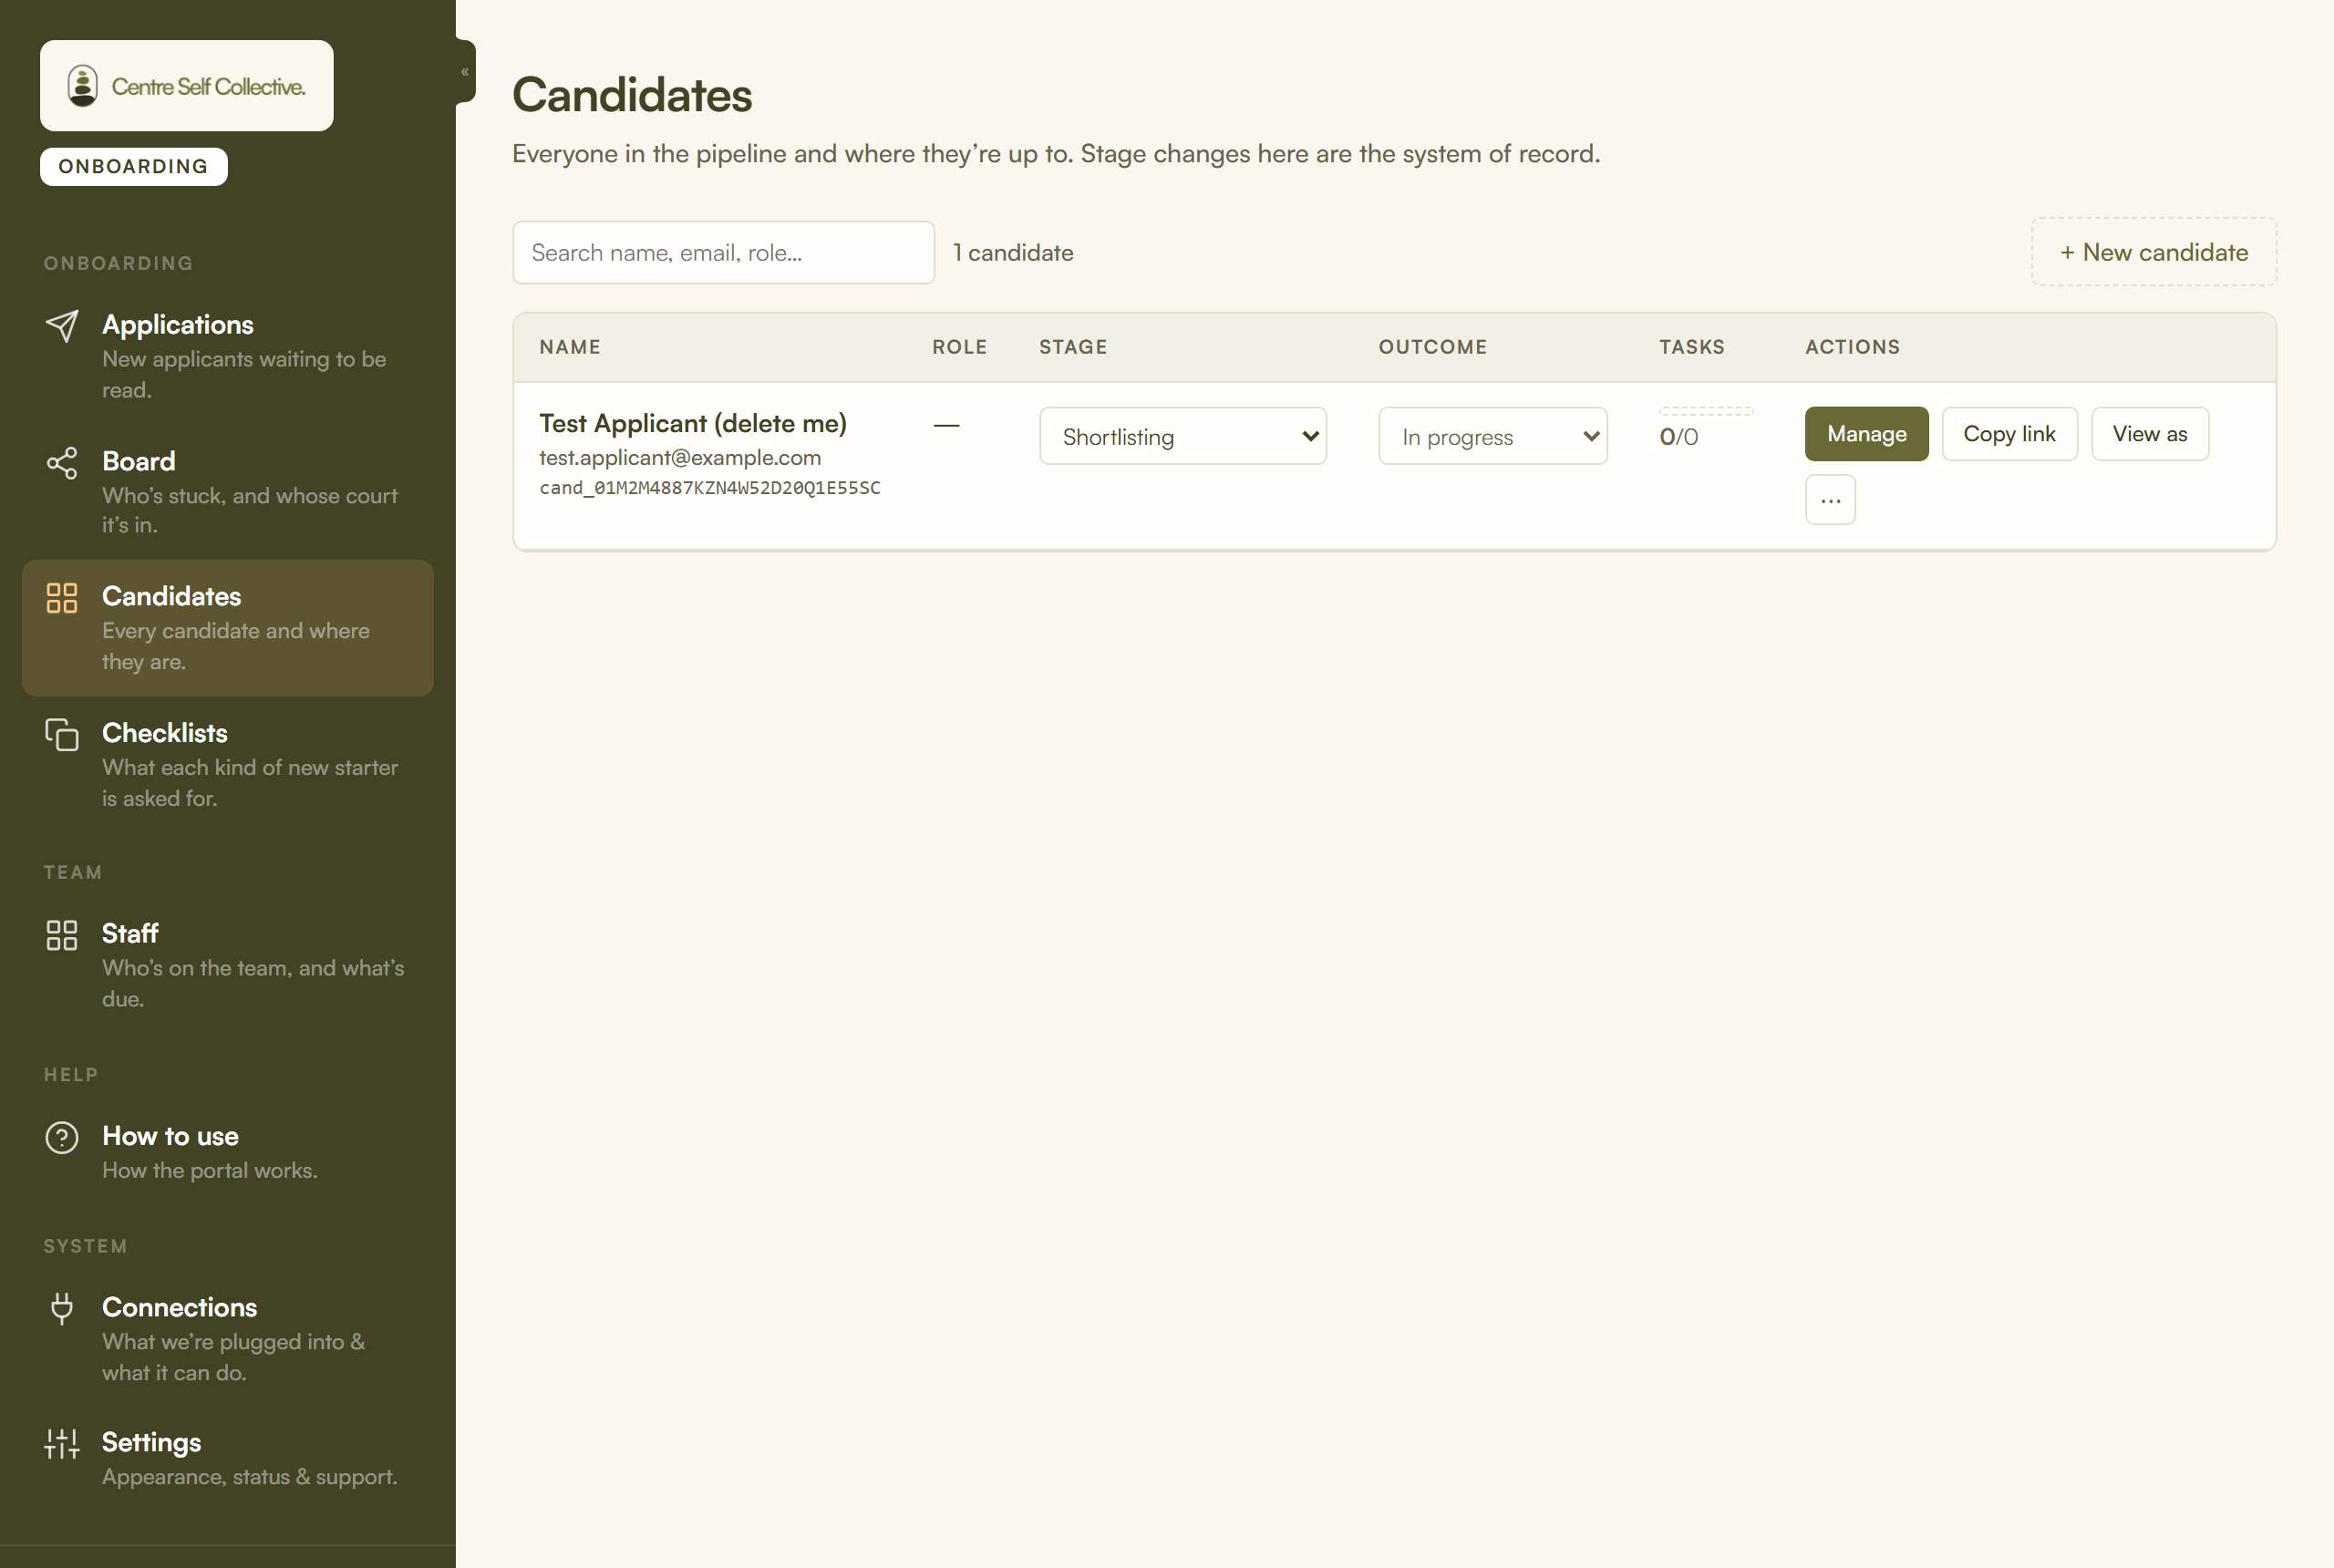
Candidates — the stage dropdown is the record -
Press Manage to open their record. Press Apply a checklist, choose how they're engaged (employee, contractor, student placement…) and their role (Social Worker, OT, Psychologist, Administrative…), and the portal builds the right list: the core items everyone owes, plus what that engagement type owes, plus what that role owes. A contractor social worker gets the police check and photo ID, the contractor's ABN and insurances, and their AASW registration, without anyone typing it.
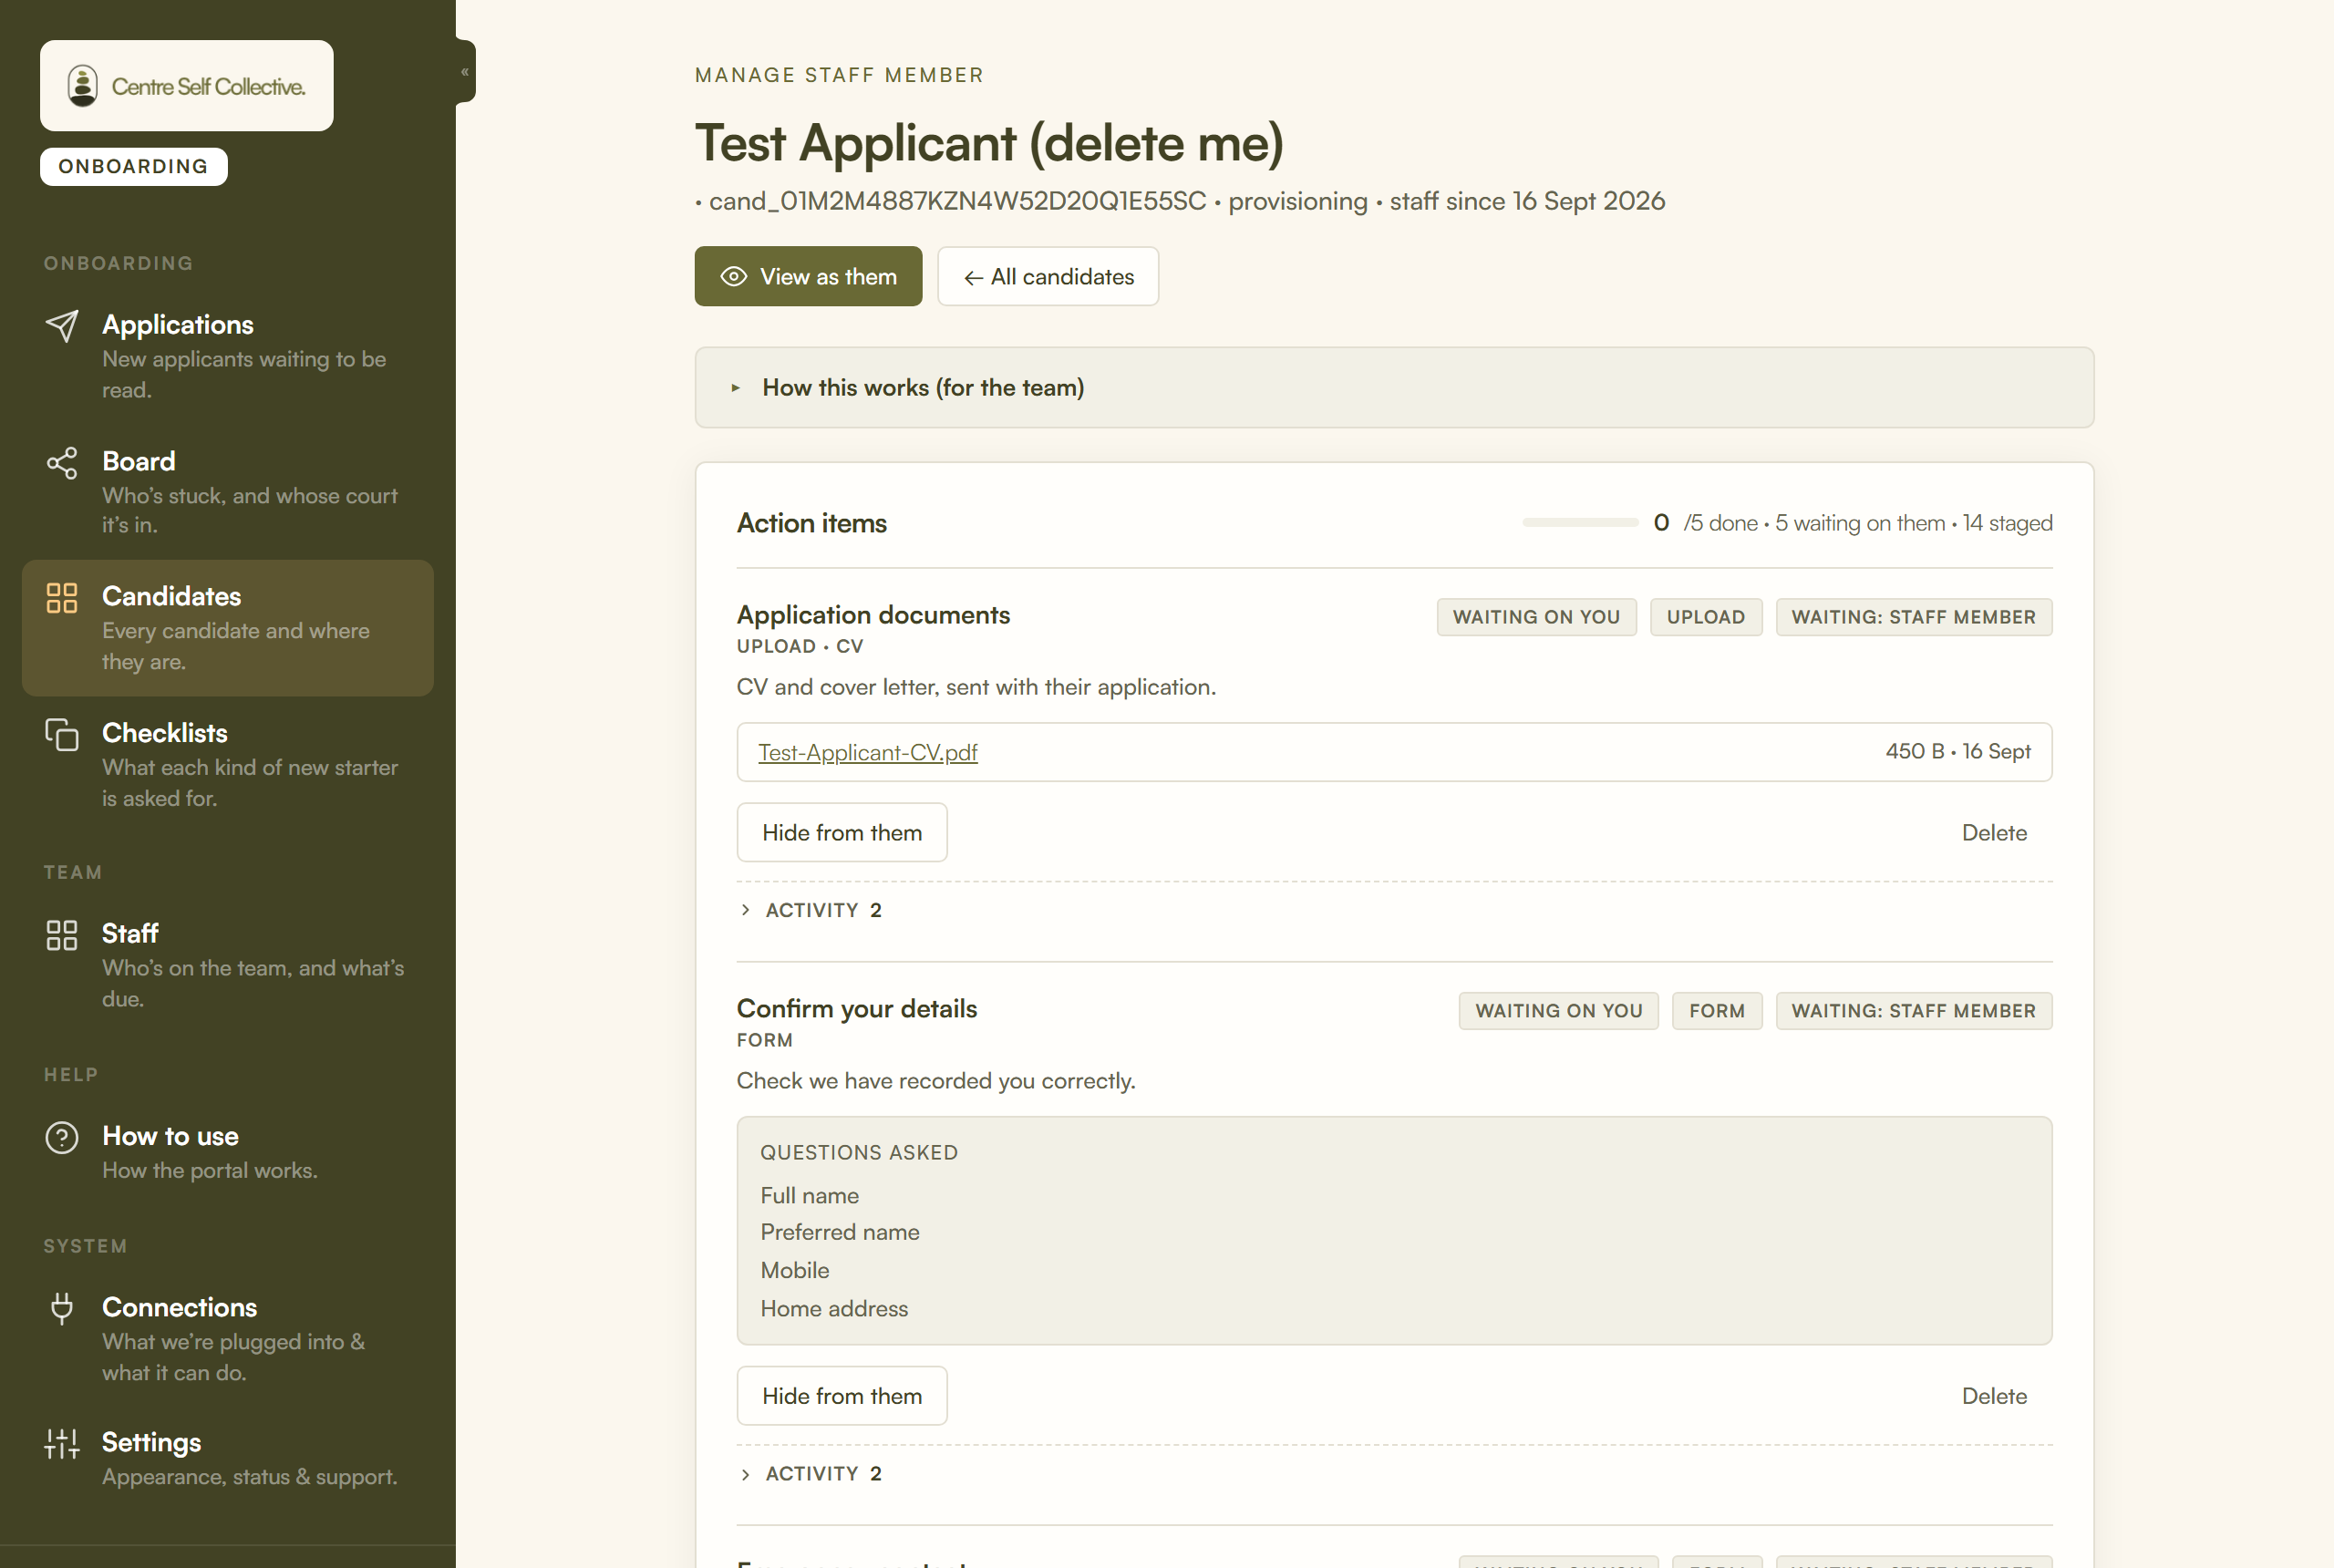
Manage — their checklist, with each item's status on the right -
Reveal the items when you're ready. Everything arrives hidden so you can look it over, add or remove things, then press Reveal to them. They only ever see what you've revealed.
-
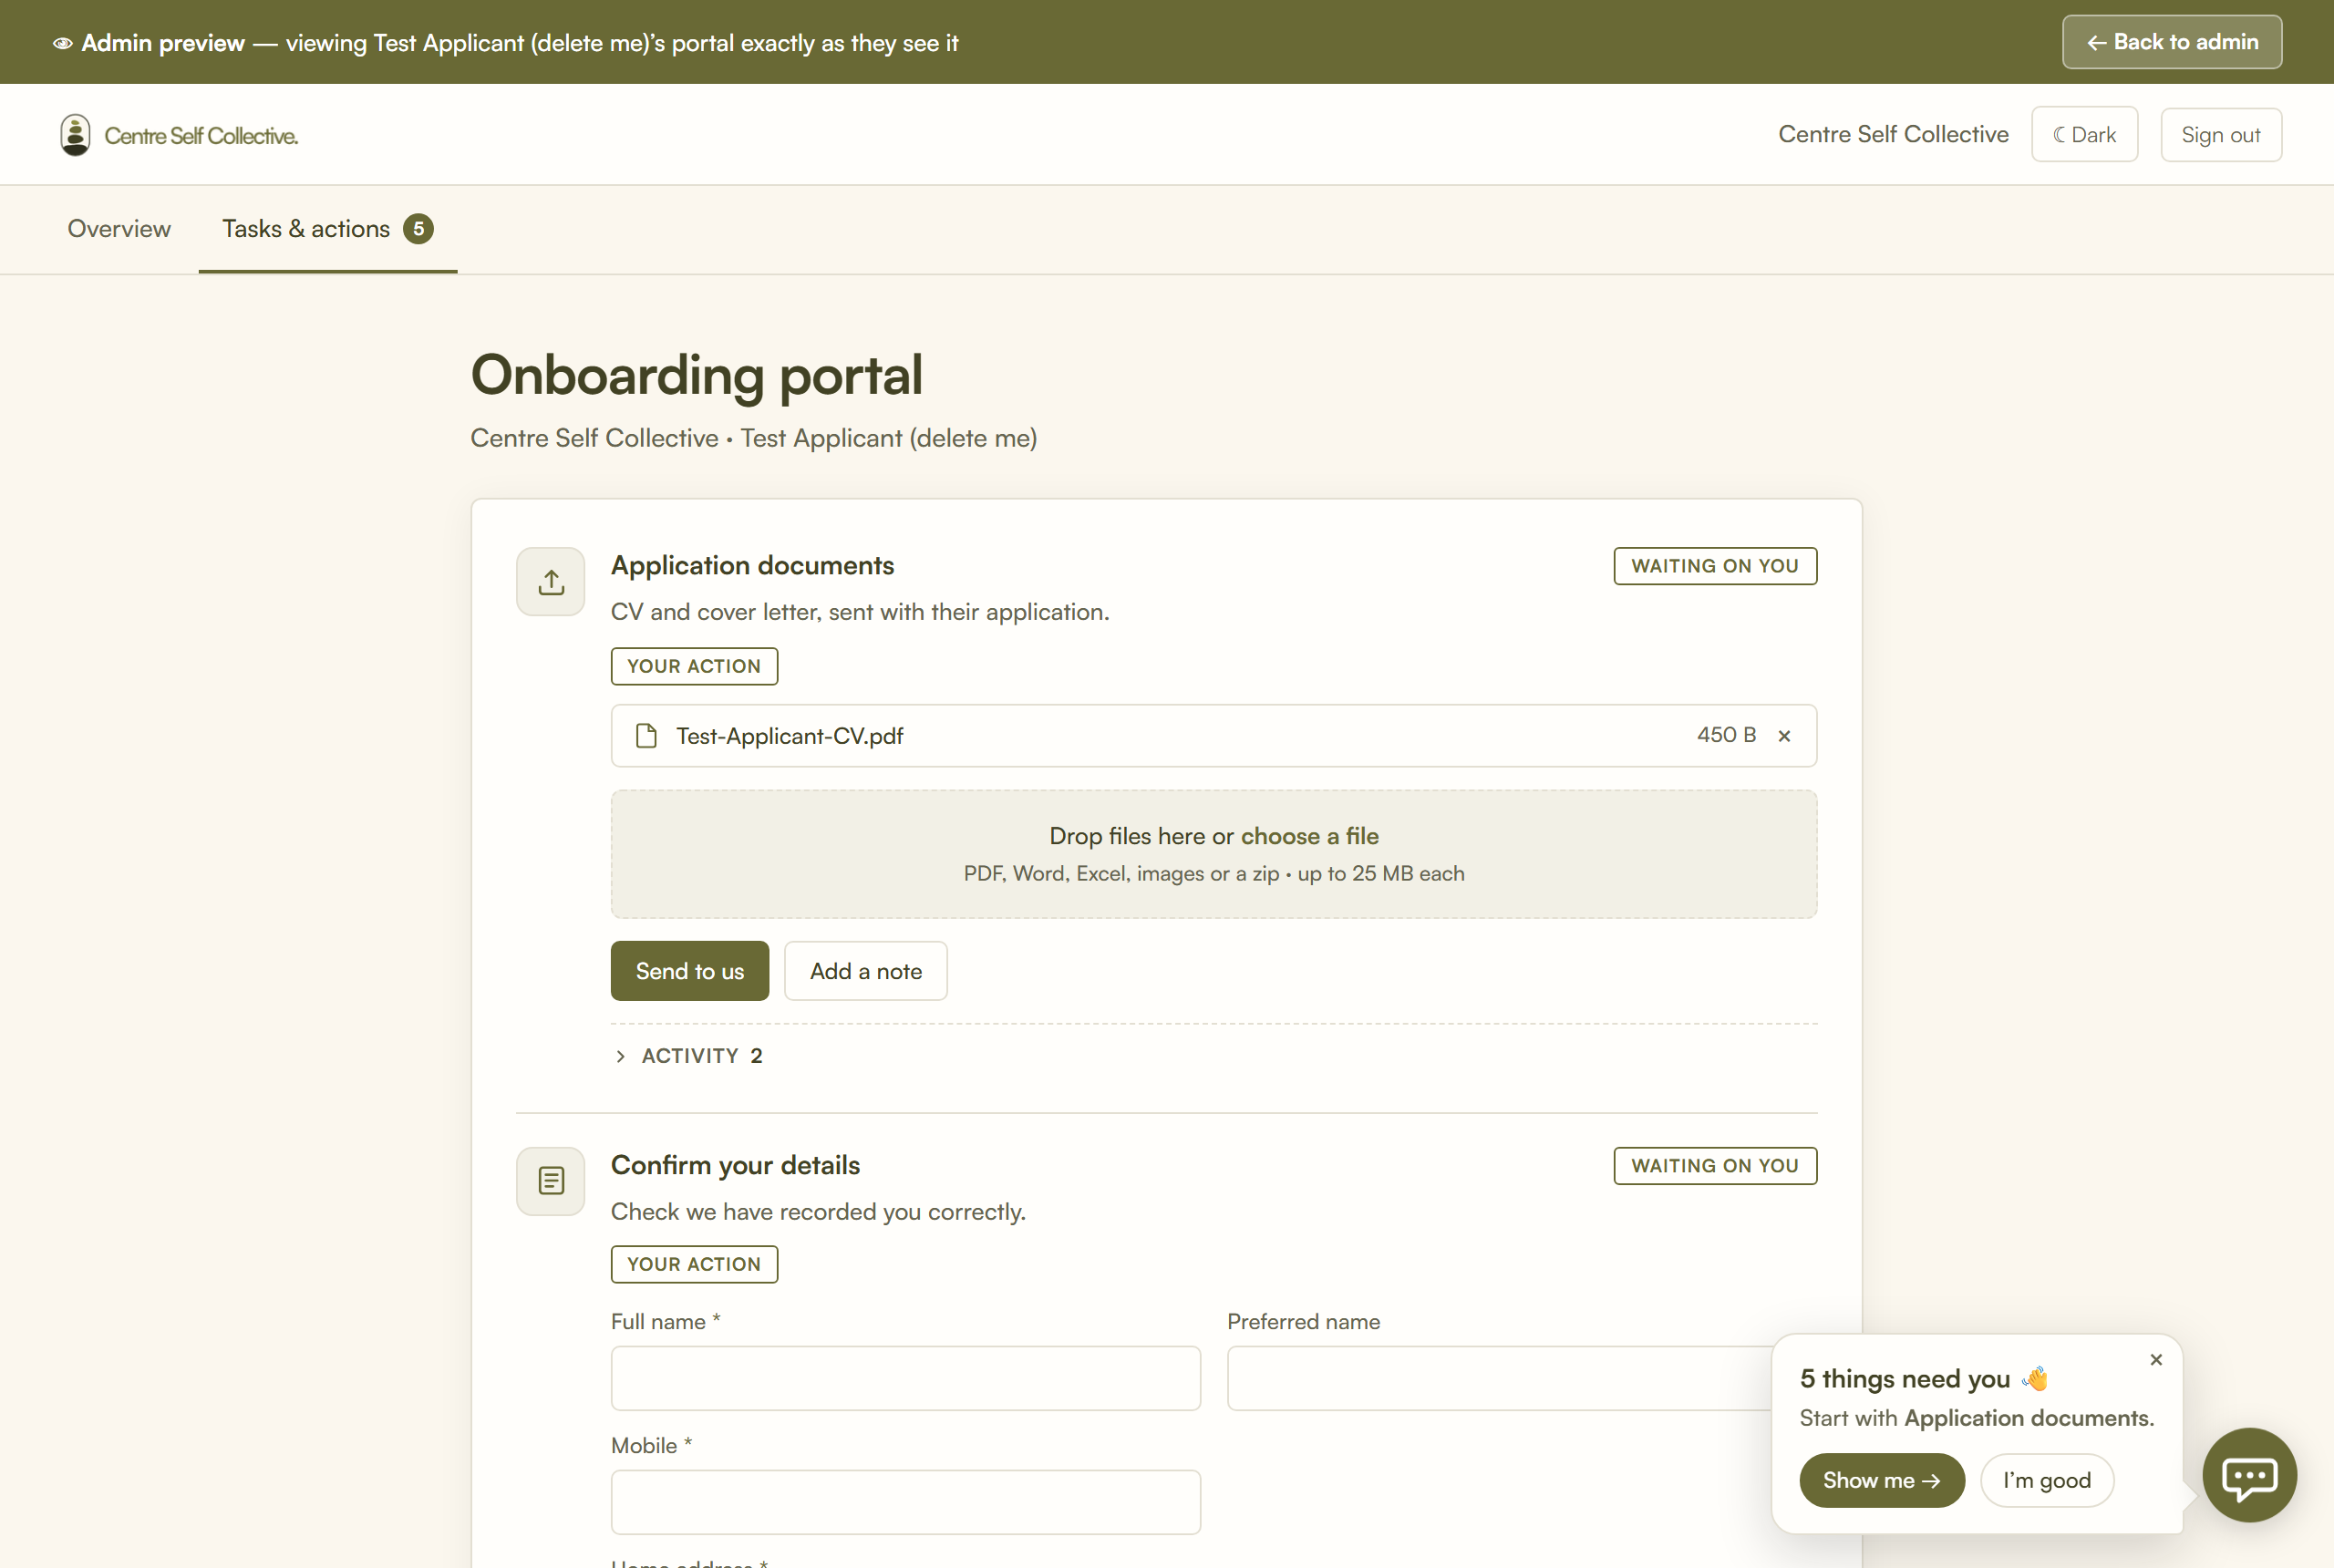
Send them their link. Copy link on the Candidates screen emails them a private sign-in link. It signs them in on their own device and keeps them signed in; no password. View as shows you exactly what they see.
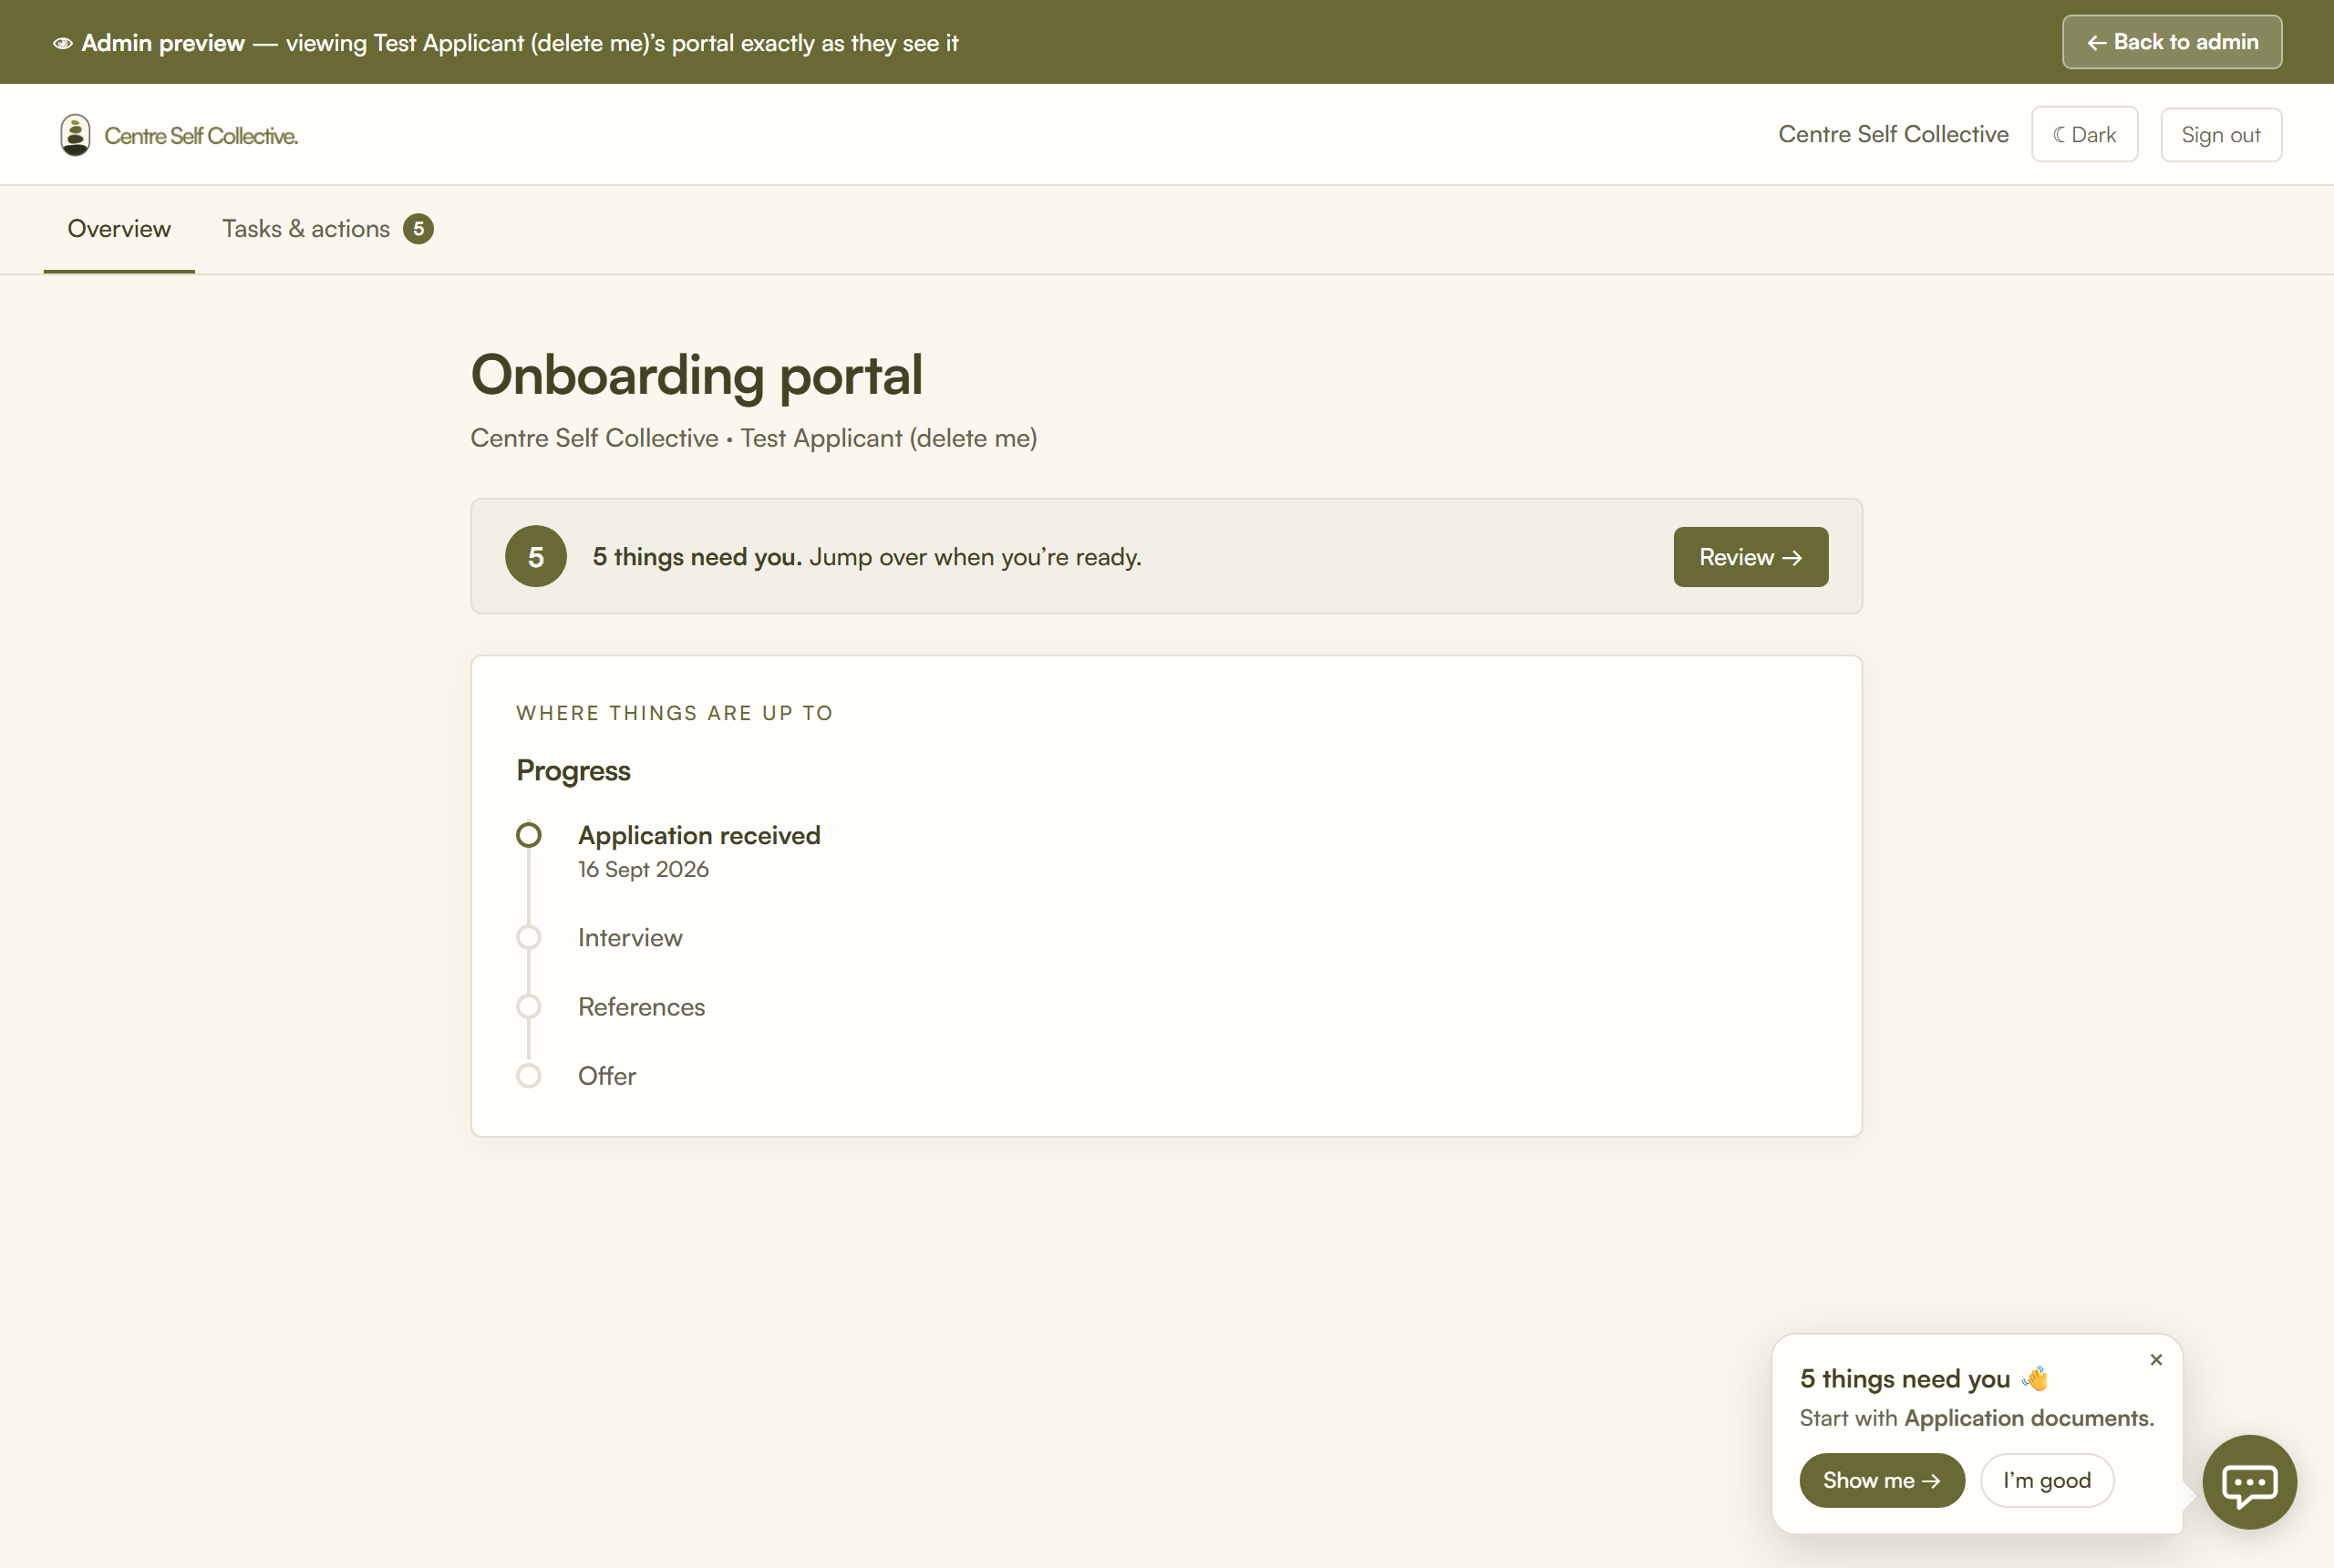
Their portal — progress, and what needs them -
They send things back; you check them. Each item on their side is a form to fill in, a document to upload, a PDF to sign, or a policy to acknowledge. When something arrives you accept it or send it back with a note. Earlier versions are kept, never overwritten. For any document that expires, the portal asks you for the expiry date at the moment you accept it; that date drives the reminders later.
Their Tasks & actions tab -
Let the chasing happen. Every morning at 8am the portal looks at what's outstanding. Anyone with items waiting on them is reminded after 3 days, again at 7, again at 14, then it stops nudging and tells you instead, because at that point a phone call works better than a fourth email. You get one digest email each morning listing what's sitting with the team and who has gone quiet.
-
Move them to Provisioning & orientation when they're hired. Their start date is stamped, they appear on the Staff screen, and the portal creates the setup work for both sides: your tick-lists (Microsoft account, SharePoint access, and for clinical staff the PRODA → Medicare provider number → Halaxy run, in that order) and their items (personal details, the NDIS Worker Orientation Module, the policy pack, their bio and photo). Yours are never shown to them; theirs appear once you reveal them.
Changing what people are asked for
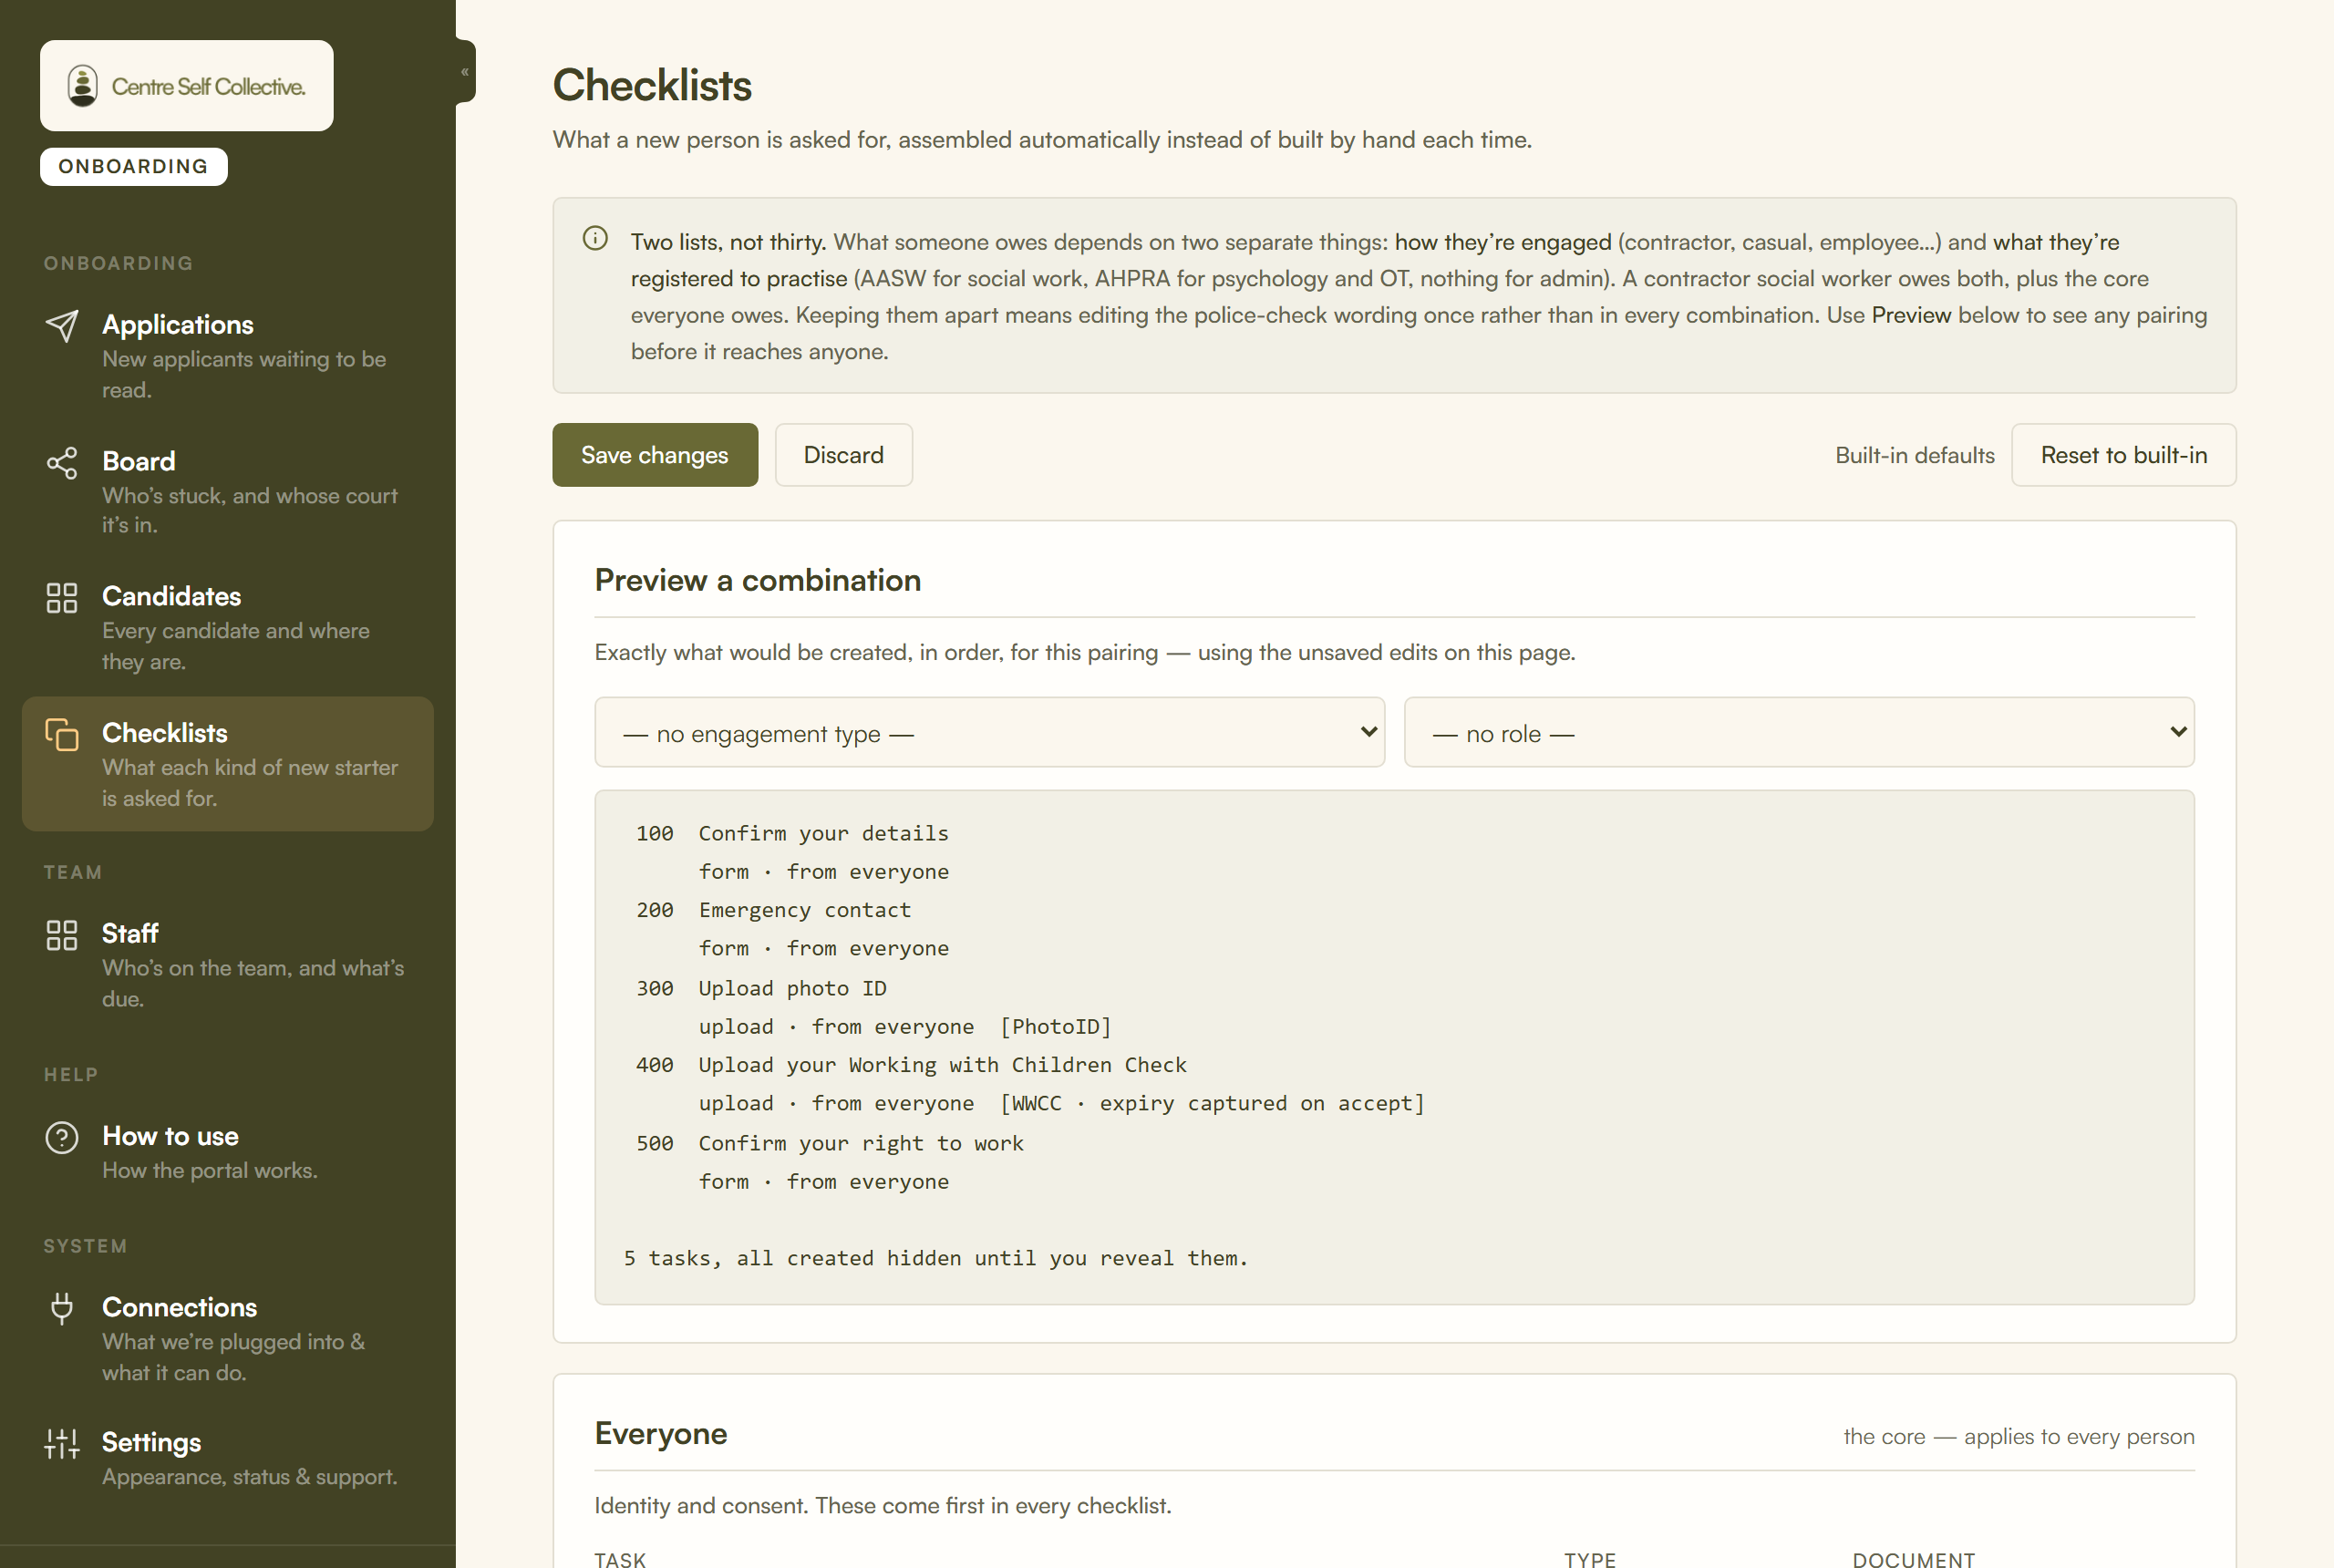
The Checklists screen is the recipe. Edit an item's wording once and every future starter gets the new version; nobody already in the pipeline is touched. Preview a combination shows exactly what any pairing of engagement type and role produces before it reaches a real person.
Current staff and expiry dates
Hiring ends; employment doesn't. The Staff screen is everyone who has been hired, and its job is to answer one question at a glance: is everyone's paperwork current, and whose runs out next?
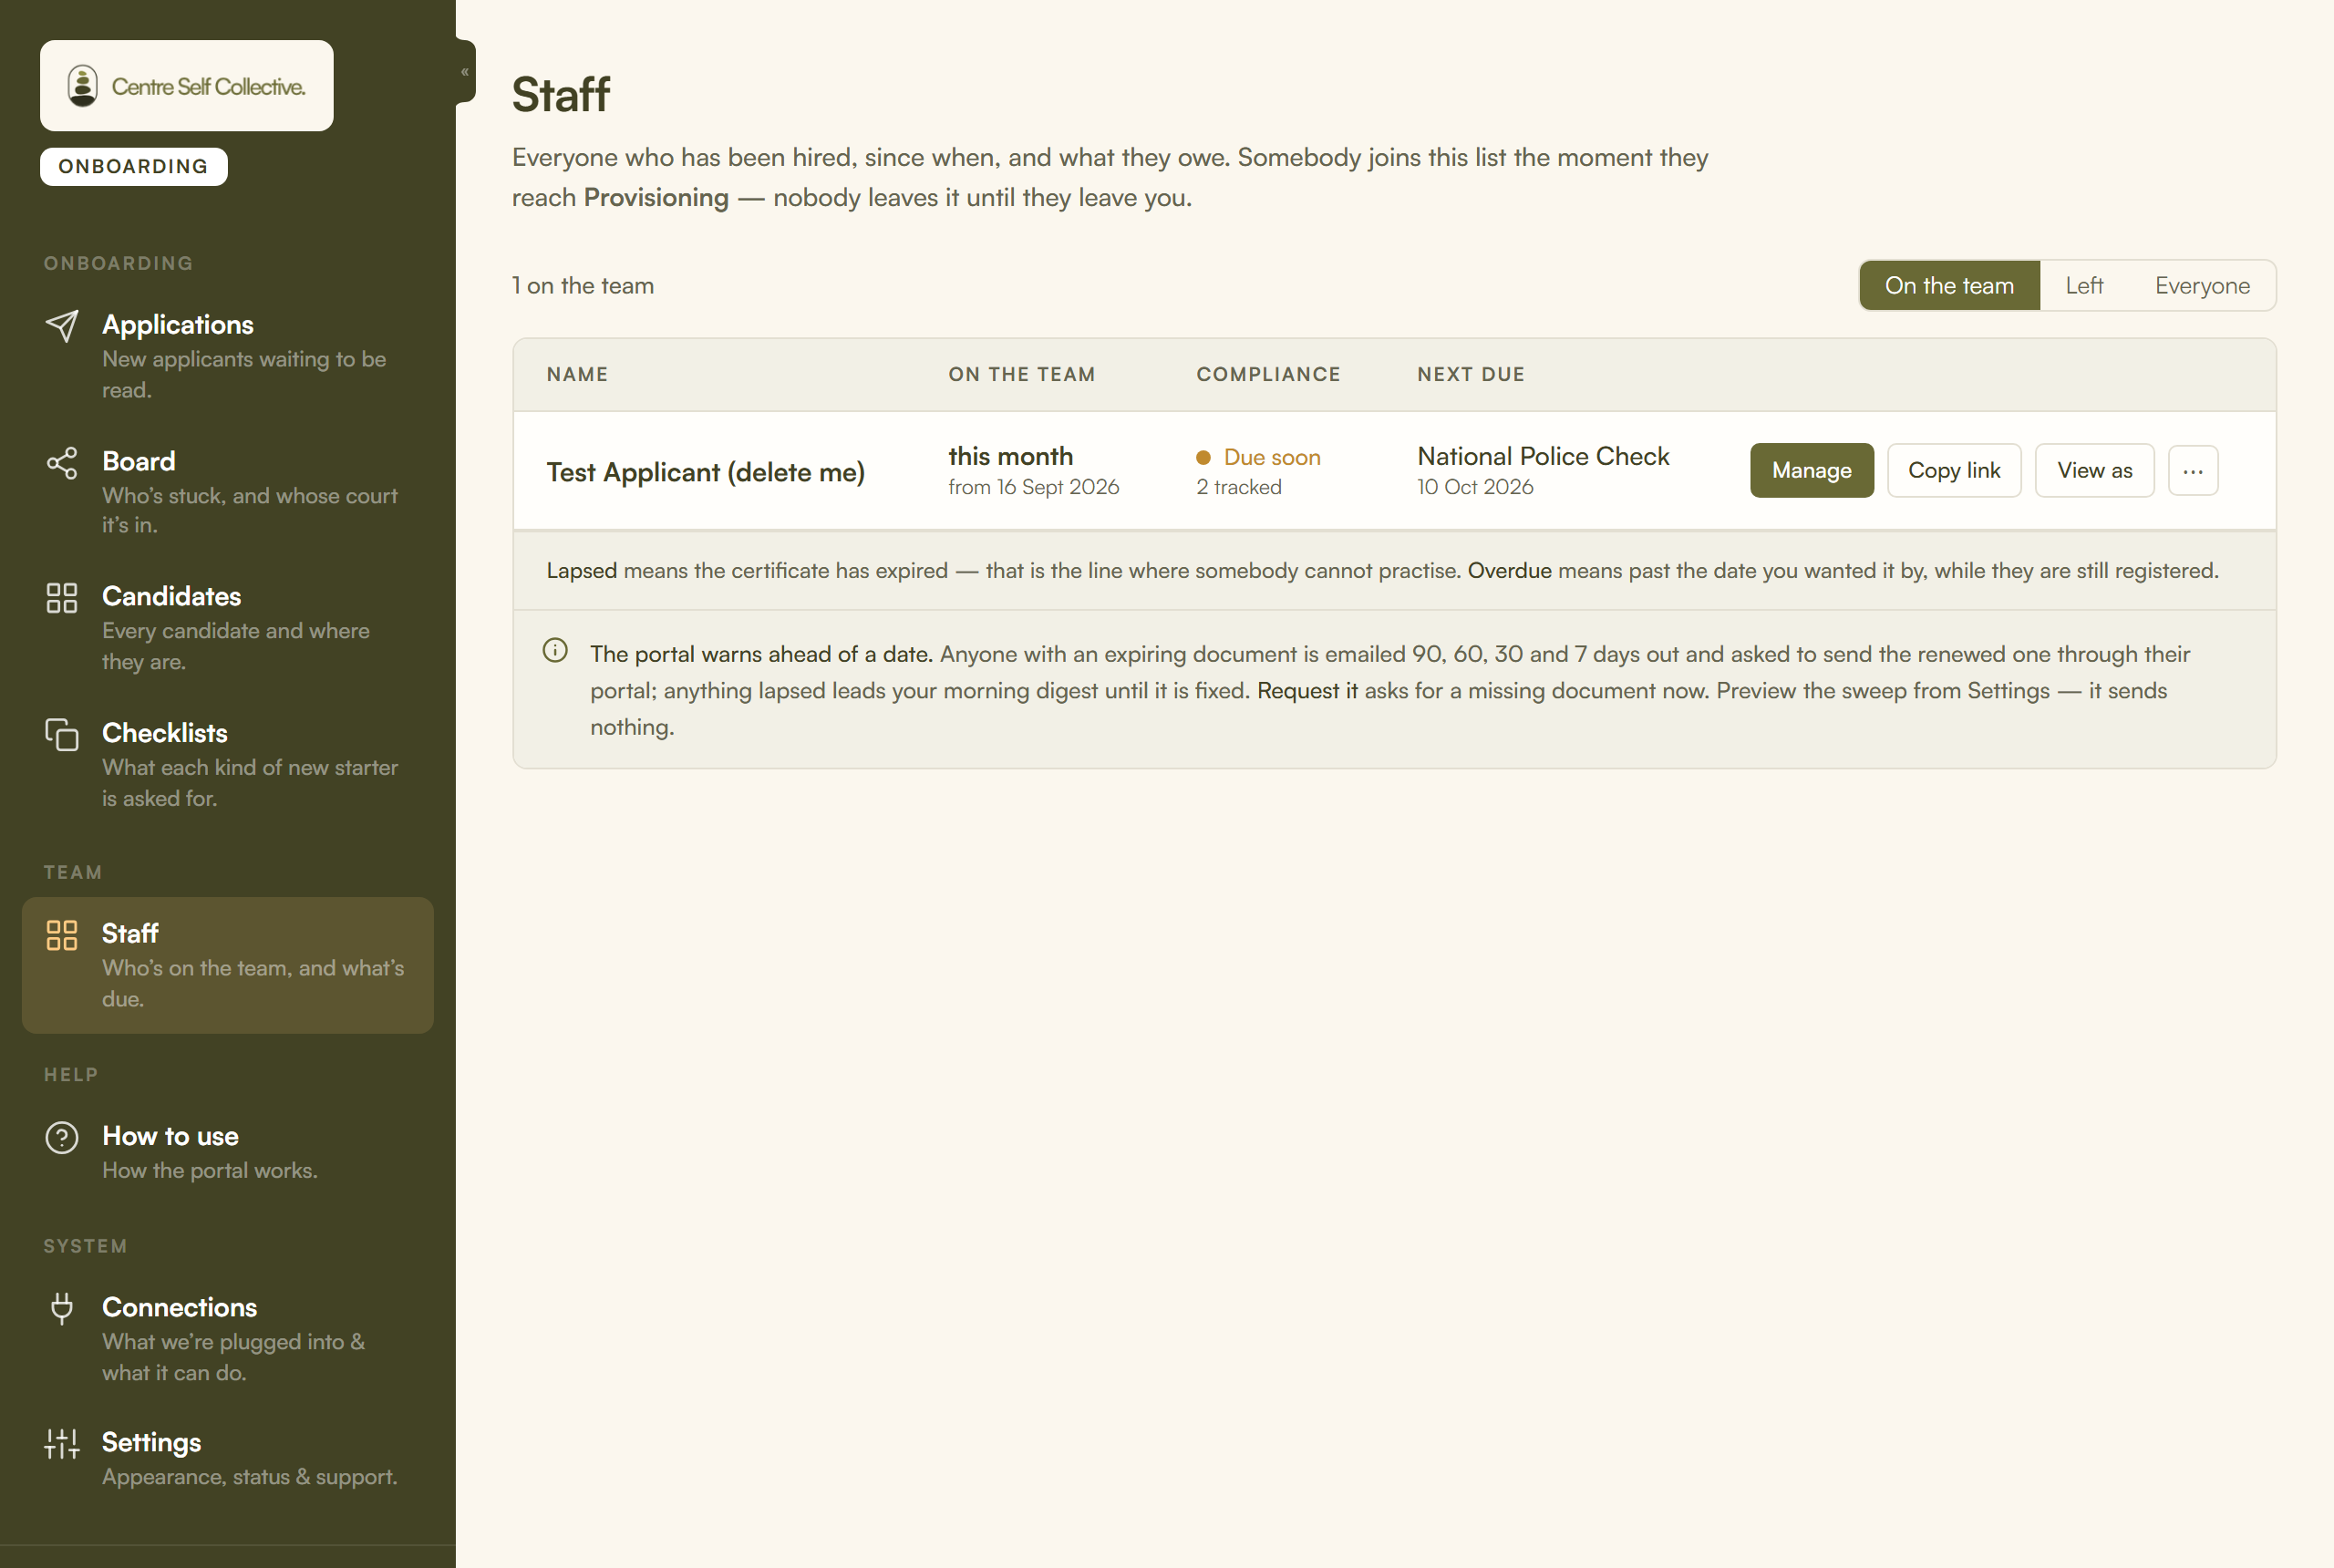
Each person shows their worst item first, using five plain states:
- LapsedThe certificate or registration has expired. This is the line where somebody cannot practise. It stays at the top of your morning digest every day until it's fixed.
- OverduePast the date you asked for it by, but not expired. Chase it.
- Due soonComing up. The portal has already started reminding them.
- ClearEverything current. Nothing to do.
- Not trackedNo expiry date recorded yet, so the portal can't warn you. Use Record a document I already have to add one.
How the warnings work
For anything with an expiry date (police check, WWCC, AHPRA or AASW registration, professional indemnity) the portal emails the person ahead of time, calmly and with the date, and asks them to send the renewed one through their portal:
When the new certificate arrives you accept it and enter the new expiry date, and the clock resets. You don't need to remember any of the dates yourself; the digest tells you who is close.
Step by step: keeping someone current
Open Staff. Anyone amber or red is at the top. Next due tells you which document and when.
Press the ⋯ menu on their row. Request it asks them for a missing or expiring document through their portal, with the reminders attached. Record a document I already have is for something that arrived by hand or email: enter the type and expiry so it's tracked like everything else.
When it arrives, accept it and enter the new expiry date. The status goes back to Clear and the next warning is scheduled from the new date.
When someone leaves, press Mark as left and give their last day. They stay on the register as Left with everything they ever sent intact, and the chasing stops.
Good to know
- Nothing goes to a person without you seeing it first, except the automatic reminders. Every "not progressing" email is shown to you before it's sent, and the wording is yours to edit.
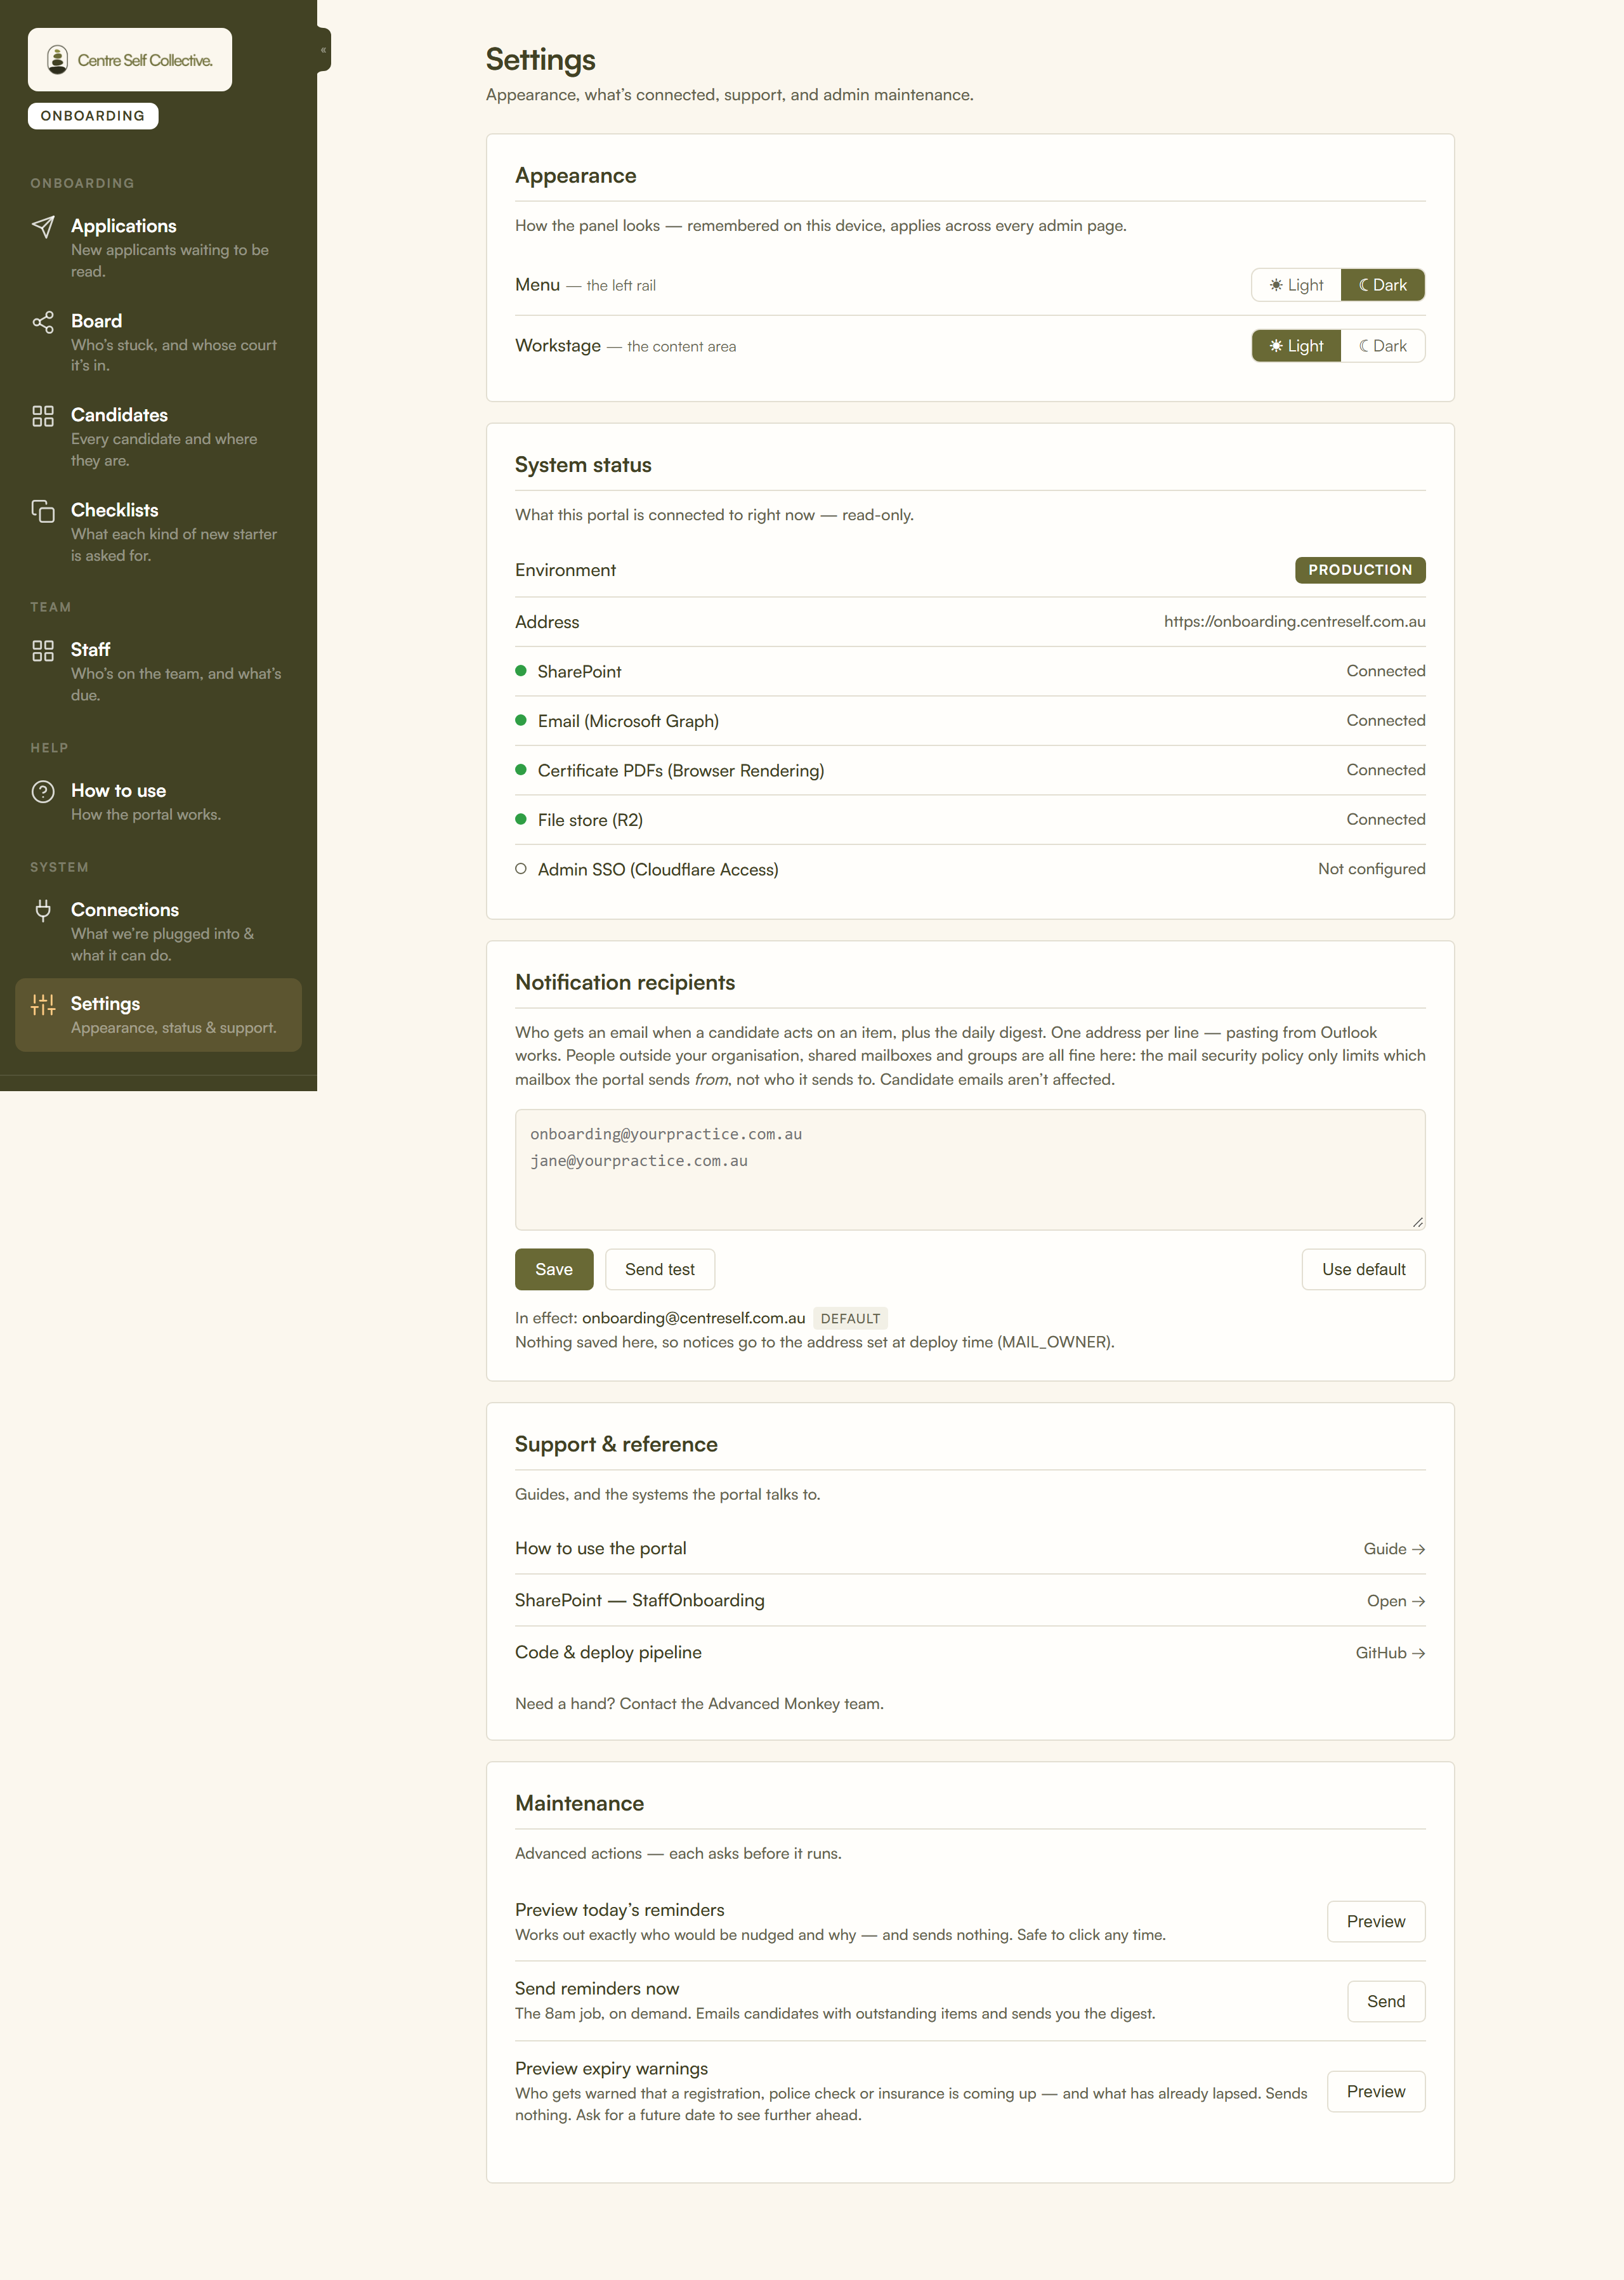
- Who gets the morning digest is set under Settings → Notification recipients. Add as many people as you like, and press Send test to check it arrives. Settings also shows whether everything the portal relies on is connected, and lets you preview the reminder and expiry sweeps without sending anything.
- Everything is also in SharePoint. Every document lands in the StaffOnboarding site in a folder under the person's name, with its type, expiry date and verdict as columns. The Expiring soon view there answers the same question the Staff screen does, without the portal.
- The portal is the record. Move people through the steps here, not by editing SharePoint. Editing the Stage column in SharePoint won't move anyone, on purpose, so there's exactly one place the truth lives.
- Applicants who aren't taken forward are cleared out after six months. Staff records are kept for as long as someone works with you.
Help and support
The portal was built and is supported by Peter Nguyen at Advanced Monkey. Anything from "how do I…" to "this looks wrong":
peter@advancedmonkey.comIt helps to include the person's name, which screen you were on, and what you expected to happen. A screenshot is better still. If something has gone to a candidate that shouldn't have, say so in the subject line and it gets looked at first.